Consecutive Unswept Lower Highs/ Higher Lows CounterCounts consecutive Lower Highs and Higher Lows; number resets to zero when previous pivot high or low gets swept
-To help give an idea of when a retracement / run-on-stops may be overdue. i.e. the higher the counter number grows, the longer we've gone without a proper retracement.
//inputs//
~pivot lookback/lookforward: increase this for more significant pivot highs and lows.
~number of pivot high 'counter' labels (pairs) to show in history.
~formatting options.
Pesquisar nos scripts por "sweep"

Mark Structure ShdwMark Structure Show is building the market swing structure, minor and sub structure and marks all possible insignificant pivots
This indicator is the alternative version of Mark Structure indicator, I had to create another indicator in order to avoid programming limitation of TreadingView.
This version uses confirmation approach as confirming by body, it means every swing low/high is confirmed when the body (of newly creating swing low/high correspondingly) takes place and intercepts it. the same behaviour is with breaking structure its confirmed only by body.
From trading prospective with this kind of approach we can easily detect manipulations (caused by sweeps) and disregard those manipulation as elements which are breaking the structure. so its extremely useful for those who are trading smart money price actions and basing on swing structure POI
it supports:
- Marking all pivots with labels or join them continuously with trend lines.
- Marking minor and sub structured swings with labels or join them continuously with trend lines. Marking last actual CHoCH and BOS. Minor and substructure are structures inside swing structure and it can differ from the structure of lower timeframe
- Marking swings of swing structure with labels or join them continuously with trend lines.
- Changing bullish and bearish colors of each kind of structures
- Changing pivot labelings
- Changing colors
Remarks:
- Don't expect to have minor and sub structure in each swing waves, its totally fine when you don't have them at all
- Swing structure is the most significant structure and shows real price direction.
- The last swing is not able to be confirmed it tries to build 2 swings that most likely would be either substructure or SMS BOS
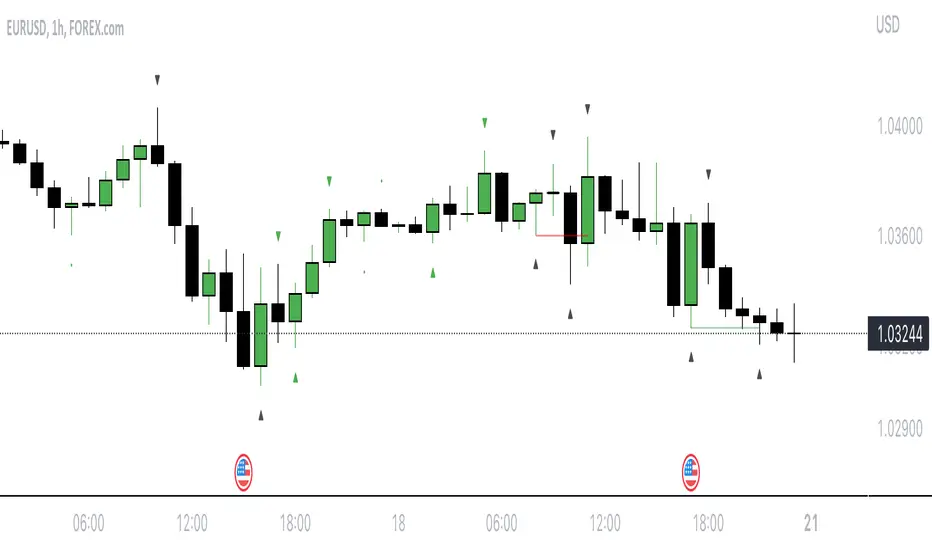
DOJI FU IndicatorIndicator is designed to paint a doji, the size of which can be adjusted in settings.
Provided there is a valid doji, the following candle is a 'FU candle' or an 'Institution' candle. This candle wicks above/below the doji and takes liquidity from above or below.
Colours can be changed
Red = Doji candle
Yellow = FU candle
Example shown on the 1hr chart, red doji indicating a change of trend upwards, the FU candle (yellow) takes liquidity from above and sweeps down.

[blackcat] L1 Ehlers Phasor IndicatorLevel: 1
Background
This script was requested by @pips_v1. "A cycle is one market characteristic that can be scientifically measured. Although they can be measured, they are still maddening because they are in essence ephemeral; they come and they go. Our recent research, however, indicates there is a fundamental cycle parameter that leads us to the correct trading strategy for any current market mode." by John Ehlers
Function
John Ehlers describe the principle of phasor indicator as "One easy way to picture a cycle is as an indicator arrow bolted to a rotating shaft, as can be seen in a phasor diagram. Each time the arrowhead sweeps through one complete rotation, a cycle is completed. The phase increases uniformly throughout the cycle. The phase continues for the next cycle but is usually drawn as reset to zero to start the next cycle." The parameter we use is the phase of the cycle. The measured phase tells us with great sensitivity when we are in the trend mode, enabling the capture of a large fraction of the trend movement.
Key Signal
Phase --> Ehlers Phasor signal
Pros and Cons
100% John F. Ehlers definition translation of his publications, even variable names are the same. This help readers who would like to use pine to read his book.
Remarks
The 102th script for Blackcat1402 John F. Ehlers Week publication.
Readme
In real life, I am a prolific inventor. I have successfully applied for more than 60 international and regional patents in the past 12 years. But in the past two years or so, I have tried to transfer my creativity to the development of trading strategies. Tradingview is the ideal platform for me. I am selecting and contributing some of the hundreds of scripts to publish in Tradingview community. Welcome everyone to interact with me to discuss these interesting pine scripts.
The scripts posted are categorized into 5 levels according to my efforts or manhours put into these works.
Level 1 : interesting script snippets or distinctive improvement from classic indicators or strategy. Level 1 scripts can usually appear in more complex indicators as a function module or element.
Level 2 : composite indicator/strategy. By selecting or combining several independent or dependent functions or sub indicators in proper way, the composite script exhibits a resonance phenomenon which can filter out noise or fake trading signal to enhance trading confidence level.
Level 3 : comprehensive indicator/strategy. They are simple trading systems based on my strategies. They are commonly containing several or all of entry signal, close signal, stop loss, take profit, re-entry, risk management, and position sizing techniques. Even some interesting fundamental and mass psychological aspects are incorporated.
Level 4 : script snippets or functions that do not disclose source code. Interesting element that can reveal market laws and work as raw material for indicators and strategies. If you find Level 1~2 scripts are helpful, Level 4 is a private version that took me far more efforts to develop.
Level 5 : indicator/strategy that do not disclose source code. private version of Level 3 script with my accumulated script processing skills or a large number of custom functions. I had a private function library built in past two years. Level 5 scripts use many of them to achieve private trading strategy.

eBacktesting - Learning: InducementeBacktesting - Learning: Inducement
Inducement is the “trap” move that often shows up right before a real push. Price briefly takes an internal swing level (a small high/low), pulls traders in the wrong direction, and then snaps back — usually right before continuing toward the larger objective.
How to study it:
- First, get a simple trend bias (are we making higher highs/higher lows, or lower highs/lower lows?).
- Watch the most recent internal swing level inside that trend.
- An inducement often looks like a quick sweep through that internal level, followed by a close back on the “correct” side.
These indicators are built to pair perfectly with the eBacktesting extension, where traders can practice these concepts step-by-step. Backtesting concepts visually like this is one of the fastest ways to learn, build confidence, and improve trading performance.
Educational use only. Not financial advice.

SMC + Dual UT Bot buy and sell AlertsMise a jour avec un EMA 20/50 et vwap
his script is a composite indicator for TradingView (Pine Script v5) that merges Smart Money Concepts (SMC) with a Dual-instance UT Bot. It has been styled with a high-contrast "Neon Cyberpunk" theme (Cyan/Pink) and is fully compliant with the CC BY-NC-SA 4.0 license.
Here is a breakdown of its two main components:
1. Smart Money Concepts (SMC)
This portion, originally by LuxAlgo, is designed to identify institutional price levels and structural market shifts. It provides a detailed map of market structure rather than simple entry/exit signals.
Market Structure (BOS & CHoCH):
BOS (Break of Structure): Marks trend continuation (e.g., breaking a higher high in an uptrend).
CHoCH (Change of Character): Marks potential trend reversals (e.g., the first time a higher low is broken in an uptrend).
Order Blocks (OB):
Highlights specific candles where institutional buying or selling likely occurred. These act as high-probability support/resistance zones.
Neon Blue/Cyan for Bullish OBs.
Neon Pink for Bearish OBs.
Fair Value Gaps (FVG):
Identifies imbalances (gaps) in price action where the market often returns to "fill" orders.
Neon Mint for Bullish FVGs.
Neon Red for Bearish FVGs.
Premium/Discount Zones: Automatically plots the range equilibrium (50% level) to help you buy in "Discount" (low) and sell in "Premium" (high) areas.
Liquidity (EQH/EQL): Automatically detects "Equal Highs" and "Equal Lows," which are magnets for price as they represent liquidity pools (stop losses).
2. Dual UT Bot Alerts
This portion provides the actual Entry Signals. It runs two separate instances of the "UT Bot" strategy simultaneously with different sensitivity settings to filter noise.
Instance 1 (Buy Only):
Settings: Key Value = 4, ATR Period = 10 (Faster, more sensitive).
Visual: Plots a Neon Cyan "Buy" label.
Function: Looks for bullish reversals earlier to catch the start of a move.
Instance 2 (Sell Only):
Settings: Key Value = 7, ATR Period = 20 (Slower, smoother).
Visual: Plots a Neon Pink "Sell" label.
Function: Uses a wider ATR band to avoid getting shaken out of shorts too early, focusing on major downtrends.
How to Use It
The strength of this script is confluence.
Wait for a Signal: Look for a UT Bot "Buy" or "Sell" tag.
Confirm with SMC: Check if the signal aligns with SMC concepts.
Example Buy: Did the UT Bot give a "Buy" signal while price was bouncing off a Bullish Order Block?
Example Buy: Did price just sweep Liquidity (EQL) before the Buy signal?
Example Sell: Is the "Sell" signal happening inside a Premium Zone or a Bearish Fair Value Gap?
avant-hier
Notes de version
1. "Pro" Badge Buy/Sell Labels
The standard text signals have been replaced with modern, professional Badge Labels that provide more information at a glance.
Visuals: Instead of simple text, the script now uses label.new to create high-visibility badges.
BUY: A Neon Cyan badge with a Rocket icon (🚀).
SELL: A Neon Pink badge with a Chart icon (📉).
Price Details: Each badge displays the exact Entry Price directly on the label.
Tooltips: If you hover your mouse over a Buy or Sell badge, a tooltip will appear showing the exact Take Profit (TP) and Stop Loss (SL) prices calculated for that trade.
2. Dynamic Take Profit (TP)
The script now automatically calculates a profit target for every trade the moment a signal is generated.
Calculation: It measures the distance between your Entry Price and the initial Stop Loss (the ATR Trailing Stop).
Risk:Reward: It multiplies that distance by your chosen Risk:Reward Ratio (default is 1.5) to project a TP target.
Visual Line: A Green Line is drawn on the chart at the TP level. It remains active until price hits it or the stop loss.
3. Active Trailing Stop Loss (SL)
The Stop Loss is no longer static; it is now "alive" and manages the trade for you.
Trailing Logic: If Use Trailing SL? is enabled (default), the SL line will automatically move up (for longs) or move down (for shorts) as the trend continues in your favor. It locks in profit by following the UT Bot's ATR trailing band.
Visual Line: A Red Line is drawn at the SL level. You can see it physically step up or down on the chart as the trend progresses.
4. Real-Time Trade Simulation
The script now simulates the lifecycle of a trade directly on the chart:
Active State: When a trade is live, the TP and SL lines extend to the right of the current candle (bar_index + 1), showing you exactly where your exit points are in real-time.
Closed State: Once the price hits either the Green TP line or the Red SL line, the script detects the "Exit." The lines stop extending and turn dotted, indicating that the trade is closed and waiting for the next signal.
Summary of New Settings
You will find a new group in the settings panel called "UT Bot: Trade Management":
TP Risk:Reward Ratio: Adjust this to change how far the Green TP line is placed (e.g., set to 2.0 for 2x return).
Use Trailing SL?: Uncheck this if you want the Red SL line to stay fixed at the initial entry risk level.
avant-hier
Notes de version
1. Live Strategy Performance Dashboard (Backtester)
Since this is an indicator, TradingView does not automatically calculate PnL (Profit and Loss). I have built a custom Simulation Engine inside the script that tracks every UT Bot signal as if you had taken the trade.
Location: Bottom Right of your chart.
Win Rate: Displays the percentage of trades that hit the Take Profit target versus the Stop Loss.
Trades (W/L): Shows the total number of signals generated, broken down by Wins and Losses.
Net Profit (R): Calculates your theoretical profit in "R-Multiples" (Risk Units).
Example: If you set your Risk:Reward to 2.0, every win adds +2R, and every loss subtracts -1R.
Dynamic Colors: The Win Rate and Profit cells turn Neon Cyan if positive (>50% or >0R) and Neon Pink if negative.
2. Multi-Timeframe Trend Dashboard
A new panel at the Top Right gives you an instant "Market Bias" reading so you don't have to scan the whole chart.
SMC Trend: Reads the Smart Money structure (Break of Structure/Change of Character) to determine if the high-level timeframe is BULLISH or BEARISH.
UT Bot Status: Displays the current active signal state:
BUY (Active): You are currently in a Long trade.
SELL (Active): You are currently in a Short trade.
NEUTRAL: No active signal or the last trade hit TP/SL.
3. Integrated Alert System
I have connected the visual lines to the alert system. You can now set a single alert on this indicator, and it will trigger for:
Entry Signals: "UT Long Entry" / "UT Short Entry"
Exits: "Take Profit Hit" / "Stop Loss Hit"
4. Consolidated Settings
To make the script easier to manage, I organized the settings into clear groups:
Dashboards: Toggle the visibility of the new panels or move the Performance Panel to a different corner.
UT Bot: Trade Management: Quickly adjust your Risk:Reward Ratio (e.g., change from 1.5 to 2.0) to see how it affects your Win Rate in real-time on the dashboard.
avant-hier
Notes de version
1. Multi-Timeframe (MTF) Trend Scanner
I have replaced the basic "Market Bias" panel with a comprehensive MTF Trend Dashboard located at the Top Right of your chart.
What it tracks: It simultaneously monitors the trend direction on 5 distinct timeframes:
15 Minute
1 Hour
4 Hour
Daily
Weekly
How it works: It runs a background calculation (using UT Bot settings Key=5, ATR=15) on these higher timeframes without you needing to switch charts.
Visuals:
BULLISH: Highlighted in Neon Cyan.
BEARISH: Highlighted in Neon Pink.
2. Strategic Confluence (How to use it)
This new dashboard transforms the script from a simple "signal generator" into a complete trading system by allowing you to filter trades based on the bigger picture.
The "All-Green" Rule: If you are scalping on a 5-minute chart and you get a BUY signal, check the dashboard. If the 1H, 4H, and Daily are all Neon Cyan (Bullish), that trade has a significantly higher probability of success.
Avoid Counter-Trend Trades: If your main chart says BUY, but the dashboard shows the 4H and Daily are Neon Pink (Bearish), you are trading against the major trend. You might want to skip that trade or reduce your risk size.
3. Summary of Dashboards
You now have two professional-grade panels on your screen:
Bottom Right (Performance): Shows the past results of the strategy on your current timeframe (Win Rate, Profit Factor).
Top Right (Trend): Shows the current state of the market across all timeframes.

eBacktesting - Learning: Equal Highs & LowseBacktesting - Learning: Equal Highs & Lows helps you spot Equal Highs (EQH) and Equal Lows (EQL) — price areas where the market has paused or reacted multiple times at nearly the same level.
These zones often act like “magnets” because many traders place stops and pending orders around them. When price returns, it can lead to a quick grab (a sweep) and reversal, or it can break through and continue. Learning to recognize EQH/EQL can improve your timing, help you anticipate where volatility may appear, and give you clearer areas for invalidation and targets.
These indicators are built to pair perfectly with the eBacktesting extension, where traders can practice these concepts step-by-step. Backtesting concepts visually like this is one of the fastest ways to learn, build confidence, and improve trading performance.
Educational use only. Not financial advice.

SMC + Dual UT Bot buy and sell AlertsThis script is a composite indicator for TradingView (Pine Script v5) that merges Smart Money Concepts (SMC) with a Dual-instance UT Bot. It has been styled with a high-contrast "Neon Cyberpunk" theme (Cyan/Pink) and is fully compliant with the CC BY-NC-SA 4.0 license.
Here is a breakdown of its two main components:
1. Smart Money Concepts (SMC)
This portion, originally by LuxAlgo, is designed to identify institutional price levels and structural market shifts. It provides a detailed map of market structure rather than simple entry/exit signals.
Market Structure (BOS & CHoCH):
BOS (Break of Structure): Marks trend continuation (e.g., breaking a higher high in an uptrend).
CHoCH (Change of Character): Marks potential trend reversals (e.g., the first time a higher low is broken in an uptrend).
Order Blocks (OB):
Highlights specific candles where institutional buying or selling likely occurred. These act as high-probability support/resistance zones.
Neon Blue/Cyan for Bullish OBs.
Neon Pink for Bearish OBs.
Fair Value Gaps (FVG):
Identifies imbalances (gaps) in price action where the market often returns to "fill" orders.
Neon Mint for Bullish FVGs.
Neon Red for Bearish FVGs.
Premium/Discount Zones: Automatically plots the range equilibrium (50% level) to help you buy in "Discount" (low) and sell in "Premium" (high) areas.
Liquidity (EQH/EQL): Automatically detects "Equal Highs" and "Equal Lows," which are magnets for price as they represent liquidity pools (stop losses).
2. Dual UT Bot Alerts
This portion provides the actual Entry Signals. It runs two separate instances of the "UT Bot" strategy simultaneously with different sensitivity settings to filter noise.
Instance 1 (Buy Only):
Settings: Key Value = 4, ATR Period = 10 (Faster, more sensitive).
Visual: Plots a Neon Cyan "Buy" label.
Function: Looks for bullish reversals earlier to catch the start of a move.
Instance 2 (Sell Only):
Settings: Key Value = 7, ATR Period = 20 (Slower, smoother).
Visual: Plots a Neon Pink "Sell" label.
Function: Uses a wider ATR band to avoid getting shaken out of shorts too early, focusing on major downtrends.
How to Use It
The strength of this script is confluence.
Wait for a Signal: Look for a UT Bot "Buy" or "Sell" tag.
Confirm with SMC: Check if the signal aligns with SMC concepts.
Example Buy: Did the UT Bot give a "Buy" signal while price was bouncing off a Bullish Order Block?
Example Buy: Did price just sweep Liquidity (EQL) before the Buy signal?
Example Sell: Is the "Sell" signal happening inside a Premium Zone or a Bearish Fair Value Gap?

First 15 min of Each Hour First 15 Minutes of Each Hour – Background Highlighter
This indicator visually highlights the first 15 minutes of every hour by coloring the chart background. It is designed to help traders quickly identify key intraday time windows often associated with increased volatility, session opens, or strategy-specific execution periods.
The highlight automatically repeats every hour and adapts to the chart’s timeframe and timezone. It works best on intraday charts (1m, 3m, 5m, 15m), where precise time-based structure is important.
Key Features:
Automatically marks minutes 00–14 of every hour
Clean, non-intrusive background shading
Fully customizable color and transparency
No future bar repainting
Ideal for scalping, session-based, and time-window strategies
Use Cases:
Identifying opening volatility each hour
Time-based entries and confirmations
Liquidity sweep or breakout models
Algo execution timing visualization
This indicator does not generate trade signals. It is a visual time-management tool intended to improve clarity and discipline in intraday trading.

Liquidation Bubbles [OmegaTools]🔴🟢 Liquidation Bubbles — Advanced Volume & Price Stress Detector
Liquidation Bubbles is a professional-grade analytical tool designed to identify forced positioning events, stop-runs, and liquidation clusters by combining price displacement and volume imbalance into a single, statistically normalized framework.
This indicator is not a repainting signal tool and not a simple volume spike detector. It is a contextual market stress mapper, built to highlight areas where one-sided positioning becomes unstable and the probability of forced order execution (liquidations, stops, margin calls) materially increases.
---
## 🔬 Core Concept
Market liquidations do not occur randomly.
They emerge when price deviates aggressively from its volume-weighted equilibrium while volume itself becomes abnormal.
Liquidation Bubbles detects exactly this condition by:
* Estimating a **dynamic equilibrium price** using an *inverted volume-weighted moving average*
* Measuring **directional price stress** relative to that equilibrium
* Measuring **volume stress** relative to its own adaptive baseline
* Normalizing both into **Z-score–like metrics**
* Highlighting only **statistically extreme, asymmetric events**
The result is a clear visual map of stress points where market participants are most vulnerable.
---
⚙️ Methodology (How It Works)
1️⃣ Advanced Inverted VWMA (Equilibrium Engine)
The script uses a custom Advanced VWMA, where:
* High volume bars receive less weight
* Low volume bars receive more weight
This produces a **robust equilibrium level**, resistant to manipulation and volume bursts.
This equilibrium is used for **both price and volume normalization**, creating a consistent statistical framework.
---
2️⃣ Price Stress (Directional)
Price stress is calculated as:
* The **maximum deviation** between high/low and equilibrium
* Directionally signed (upside vs downside)
* Normalized by its own historical volatility
This allows the script to distinguish:
* Aggressive upside exhaustion
* Aggressive downside capitulation
---
3️⃣ Volume Stress
Volume stress is measured as:
* Deviation from volume equilibrium
* Normalized by historical volume dispersion
This filters out:
* Normal high-volume sessions
* Illiquid noise
And isolates abnormal participation imbalance.
---
4️⃣ Liquidation Logic
A liquidation event is flagged when:
* Both price stress and volume stress exceed adaptive thresholds
* The imbalance is directional and statistically extreme
Optional Combined Score Mode allows aggregation of price & volume stress into a single composite metric for smoother signals.
---
🔵 Bubble System (Signal Hierarchy)
The indicator plots **two tiers of bubbles**:
🟢🔴 Small Bubbles
* Early warning stress points
* Localized stop-runs
* Micro-liquidations
* Often precede reactions or short-term reversals
🟢🔴 Big Bubbles
* Full liquidation clusters
* Forced unwinds
* High probability exhaustion zones
* Frequently align with:
* Intraday extremes
* Range boundaries
* Reversal pivots
* Volatility expansions
Bubble color:
* **Green** → Downside liquidation (sell-side exhaustion)
* **Red** → Upside liquidation (buy-side exhaustion)
Bubble placement is **ATR-adjusted**, ensuring visual clarity without overlapping price.
---
🔄 Cross-Market Volume Analysis
The script allows optional **external volume sourcing**, enabling:
* Futures volume applied to CFDs
* Index volume applied to ETFs
* Spot volume applied to derivatives
This is critical when:
* Your traded instrument has unreliable volume
* You want **institutional-grade confirmation**
---
🧠 How to Use Liquidation Bubbles
This indicator is **not meant to be traded alone**.
Best use cases:
* 🔹 Confluence with support & resistance
* 🔹 Contextual confirmation for reversals
* 🔹 Identifying fake breakouts
* 🔹 Liquidity sweep detection
* 🔹 Risk management (avoid entering into liquidation zones)
Ideal for:
* Futures
* Indices
* Crypto
* High-liquidity FX pairs
* Intraday & swing trading
---
🎯 Who This Tool Is For
Liquidation Bubbles is designed for:
* Advanced discretionary traders
* Order-flow & liquidity-based traders
* Macro & index traders
* Professionals seeking **context**, not signals
If you want **where the market is fragile**, not just where price moved — this tool was built for you.
---
📌 Key Characteristics
✔ Non-repainting
✔ Statistically normalized
✔ Adaptive to volatility
✔ Works on all timeframes
✔ Futures & crypto ready
✔ No lagging indicators
✔ No moving average crosses
---
Liquidation Bubbles does not predict the future.
It shows you where the market is most likely to break.
— OmegaTools

Simple PDH / PDL Clean Entries (NZ Time)Simple PDH / PDL Liquidity Entry Indicator
This indicator is designed for clean, stress-free intraday trading on Gold. It identifies high-probability buy and sell opportunities based on a liquidity sweep and reclaim of the previous day’s high or low (PDH / PDL). Signals are limited to one trade per session using New Zealand time, helping prevent overtrading. Each signal prints a clear BUY or SELL icon directly on the candle, along with a concise label showing entry price, stop loss, and take profit. No indicators, no clutter — just key levels, disciplined execution, and institutional-style simplicity.

MindEdge 2-7am (utc +1)This indicator highlights the 2-7am time for me to trade the opposite direction of a m15 sweep

ATR Momentum StatusThis indicator measures whether volatility (ATR) is increasing or decreasing, and classifies momentum strength into four clear states:
- WEAK
- STRONG
- EXPANSION
- DECREASING
It helps traders avoid fake moves and only trade when real participation enters the market, especially when used together with FVG CE Acceptance (SMC).
ATR Momentum States (Very Important)
Status Meaning Market Condition
WEAK Small ATR increase Low participation
STRONG Healthy ATR increase Real buyers/sellers entering
EXPANSION Large ATR spike Aggressive momentum / breakout
DECREASING ATR falling Momentum dying / trap risk
What This Indicator Is NOT
❌ Not a buy/sell signal
❌ Not direction bias
❌ Not entry by itself
👉 It is a trade quality filter
✅ Best Use Case (SMC / FVG Traders)
This indicator shines when combined with:
- FVG
- CE (Consequent Encroachment)
- Liquidity Sweep
- Acceptance Candle
Important Risk Filter (Golden Rule):
ATR Status Trade Quality
EXPANSION + Acceptance ⭐⭐⭐⭐⭐ (Best)
STRONG + Acceptance ⭐⭐⭐⭐
WEAK + Acceptance ❌ Avoid
DECREASING ❌ No Trade
Why This Works (Conceptually):
- FVG CE acceptance = price is accepted
- ATR expansion = participation is real
- Together = institutional momentum, not retail noise

Chainbey Ai - Previous Day High & Low📌 Chainbey Ai – Previous Day High & Low (Source Candle)
This indicator automatically plots the Previous Day High (PDH) and Previous Day Low (PDL) on any intraday chart, starting from the exact candle where those levels were formed — not from the new day open. This removes visual gaps and gives a more accurate market structure view.
🔹 Key Features
✅ Accurate PDH & PDL levels based on the full previous trading day
🎯 Lines start from the actual high/low candle (no artificial gap)
🏷️ Optional PDH / PDL labels placed directly on source candles
🟦 Optional range background fill between PDH and PDL
📊 Works perfectly on 5m, 15m, 30m, 1H intraday charts
⚡ Lightweight, clean, and repaint-safe
🧠 Best Use Cases
Liquidity sweep & stop-hunt detection
Breakout vs fake-breakout analysis
Support / resistance from prior session
London & New York session bias confirmation
⚠️ Notes
Levels are calculated using the broker’s daily session
Designed for intraday trading, not daily/weekly charts

Auction Session Ranges (AMT Edition) [ Alerts] Auction Session Ranges (AMT Edition)
► Overview
The Session Ranges ( AMT Edition) is a session-based market structure and auction analysis tool designed to visually reveal acceptance, rejection, imbalance, and continuation across the Asia, London, and New York CME trading sessions.
Unlike typical indicators, this script is grounded in Auction Market Theory (AMT) and session-based structure, focusing on how price behaves at session extremes rather than relying on lagging calculations, oscillators, or predictive algorithms. Its purpose is to highlight areas where the market has earned the right to be traded, providing traders with a clear, rules-based framework for high-probability directional trades.
Important for backtesting: To properly backtest session extremes, Interaction Lines, and Closest Opposite Extreme Lines, you must use TradingView’s replay mode, as real-time bar-by-bar progression is required to observe how the market interacts with session extremes over time.
► Key Innovations
This is not a conventional session high/low indicator. Its originality comes from several unique design elements:
Differentiates interaction from true acceptance: Price touching an extreme does not automatically indicate directional intent.
Separates directional confirmation from range-bound indecision: Only confirmed crossings beyond the Interaction Line signal actionable bias.
Tracks failed auctions and partial acceptance: No volume profile or order book data required.
Visual, rule-based trade permission: Signals are objective, minimizing subjective interpretation.
Interaction & Closest Opposite Extreme Lines: Together, these lines map how far an auction progresses after an extreme is tested, highlighting continuation, partial acceptance, or failed auctions.
► Core Concepts Explained
1. Session Highs & Lows (Solid Lines)
Plotted continuously for each CME session (Asia, London, New York).
Represent the current auction boundaries for that session.
2. True Interaction Lines (Thick Dotted Lines)
Drawn when price touches or breaks a session extreme:
Touching session high → dotted line at the low of that candle
Touching session low → dotted line at the high of that candle
Auction context:
Touching alone ≠ acceptance
Acceptance occurs only when price moves beyond the Interaction Line and holds
Trading principle:
Price has not crossed → no directional bias → do not trade
Price crosses and holds → directional bias established
3. Acceptance vs Rejection
Accepted direction: Price crosses and holds beyond the Interaction Line
Rejected direction: Price crosses the line but immediately reverses
Neutral / No-Trade: Price trapped between extreme and Interaction Line
Important: Acceptance is conditional and dynamic. Each time price crosses back over the Interaction Line, acceptance is lost.
4. New Extremes = Continuation
Once an Interaction Line is crossed, each new session extreme in that direction reinforces the trend.
Traders should only look for continuation setups along the established directional bias.
AMT interpretation:
Repeated new extremes → directional imbalance
Failure to make new extremes → potential balance or rotation
5. Closest Opposite Extreme Lines (Thin Dotted Lines)
After acceptance, the script tracks price progress toward the opposite session extreme.
Plotted only if price reaches a user-defined percentage of the session range.
Helps identify:
Full acceptance (price reaches opposite extreme)
Partial acceptance (price stalls)
Failed auctions (price cannot progress meaningfully)
Trading guidance once Closest Lines appear:
Partial acceptance: Price stalls near the Closest Line but does not fully reach the opposite extreme → bias remains valid, but the move may be weakening; consider scaling out or tightening stops.
Full acceptance: Price reaches the opposite extreme → directional auction fully confirmed; bias continues, but expect potential rotation or balance afterward.
Failed auction (cannot progress meaningfully): Price reverses before reaching the Closest Line → signals exhaustion; avoid chasing the move and treat as potential trend failure.
Note: Only relevant after Interaction Line is crossed; if price never crosses the Interaction Line, Closest Lines have no trading significance.
► Step-by-Step Usage
Wait for a session extreme
Let price interact with the session high or low.
Observe the Interaction Line
No cross → do not trade
Cross and hold → directional bias established
Trade in the direction of new extremes only
Ignore counter-trend trades unless the Interaction Line is lost
Manage risk using structure
Interaction Line acts as a dynamic invalidation level
Use Closest Lines for context
Partial acceptance → bias valid, watch for weakening
Full acceptance → bias strong, continuation likely
Failed attempt → potential exhaustion, do not chase
Useful for trade management, scaling, and expectation setting
► Price Retests & Pullbacks
Scenario:
Price crosses above the Interaction Line (e.g., from a low interaction).
Over the next 3–4 15-minute bars, price dips back toward the Interaction Line, with wicks touching it but no decisive close below.
Interpretation:
Initial Acceptance Confirmed: Bias remains valid while price holds above/below the line.
Temporary Pullback / Retest: Market is re-evaluating the auction; testing participant agreement.
Wicks Touching the Line: Partial probing or liquidity sweep; market still respects original acceptance.
Trading Implication:
Continuation bias remains intact.
Pullbacks near the Interaction Line offer lower-risk entries.
Decisive close below → acceptance lost, signaling trend failure or invalidation.
Market Psychology:
Healthy auction behavior: extreme tested → acceptance confirmed → boundary retested for liquidity → continuation.
Failure to hold above signals weak acceptance or exhaustion.
✅ Key Takeaways:
Holding above Interaction Line → bias intact, pullback = opportunity
Closing below Interaction Line → acceptance lost, bias invalidated
Wicks touching only → normal retest, still valid
► No-Trade Conditions
Avoid trading when:
Price never crosses the Interaction Line
Price remains trapped between the extreme and the Interaction Line
Market rotates without forming new extremes
These indicate balance, not directional opportunity.
► Alerts
Optional alerts trigger when price crosses an Interaction Line for:
Asia session
London session
New York session
Alerts signal possible acceptance, not automatic trade entries.
► Who This Script Is For
Best suited for traders who:
Trade session structure in futures, indices, or FX
Follow Auction Market Theory principles
Prefer objective, rules-based confirmation
Want fewer but higher-quality trade opportunities
Not intended for:
Indicator stacking
Predictive trading
High-frequency scalping without structure
► Final Notes
This script does not tell you when to buy or sell.
It shows where the market has earned the right to be traded.
Use it as a decision filter, not a prediction engine.

Gold Chop MeterWhat it does
It’s a market quality filter. It does NOT tell you direction.
It tells you when Gold is too compressed/choppy to trust clean expansions.
NORMAL = tradable conditions
CHOP = compressed / messy conditions
NO TRADE (30M BOX) = hard stop (30M is CHOP)
NO TRADE (HTF CHOP) = hard stop (majority of higher TFs are CHOP)
How to read the panel (left → right)
You’ll see:
1H: NORMAL/CHOP | 30M: NORMAL/CHOP | 15M: NORMAL/CHOP | 5M: NORMAL/CHOP | TRADE/NO TRADE
The rules (exact)
If 30M = CHOP → NO TRADE (30M BOX)
This is your strongest filter. Don’t fight it.
If 30M isn’t CHOP, then it checks majority:
Default: 1H + 30M + 15M
If 2 of 3 are CHOP → NO TRADE (HTF CHOP)
If those are not true → it prints TRADE
If 15M is CHOP but 30M is NORMAL, it prints:
“TRADE (CAUTION – 15M CHOP)”
That means: trade smaller, quicker, or wait for cleaner trigger.
Settings you actually need to touch
1) Profile
Auto (by session) = best for most days (it changes the threshold by time window)
NYO / Overnight / London profiles are there if you want to force one behavior.
2) ATR Length (fixed)
Default 4 is good for Gold.
If it’s too sensitive (flips CHOP too often), raise to 5.
If it’s too slow (stays NORMAL when price is dead), drop to 3.
3) Include 5M in majority filter? (default OFF)
OFF = cleaner, less restrictive (recommended)
ON = stricter filter (needs 3 of 4 to be CHOP for “HTF CHOP” but 5M influences the count)
How to use it with your purge strategy (simple playbook)
When it says TRADE
You’re allowed to execute your normal model:
Sweep → displacement / CHoCH → first return → run
When it says TRADE (CAUTION – 15M CHOP)
Still tradable, but:
take A+ only
smaller size
quicker TP, don’t expect runners
demand a cleaner trigger (strong displacement)
When it says NO TRADE
You don’t force entries.
What you do instead:
wait for 30M to flip back to NORMAL
or wait for a clear range break + retest that turns the environment back to expansion
Quick “decision cheat”
30M CHOP? → Stop. No trade.
2/3 HTFs CHOP? → Stop. No trade.
Only 15M CHOP? → Trade, but cautious.
All NORMAL? → Green light.

ZOE IFVG+his indicator combines the original ICT Inversion Fair Value Gap (iFVG) Detector by ote618 with a manual checklist panel for trade analysis.
Features:
ICT iFVG Detector
Automatically identifies bullish and bearish inversion fair value gaps (iFVGs) based on 3-candle formation logic.
Draws colored boxes on the chart to highlight confirmed iFVG zones.
Sends optional alerts when iFVGs are confirmed, respecting your selected timeframe.
Works exactly like the original ote618 iFVG script, with no modifications to the core detection logic.
Manual Checklist Panel
Displays a customizable checklist to track key market factors:
Liquidity Sweep
HTF FVG
V-Shape Recovery
Inversion FVG
Clear Opposite DOL
SMT Divergence
Assigns a score and grade (A+ to F) based on selected conditions.
Panel position and background can be customized.
Allows traders to visually track trade quality alongside iFVG zones.
Usage:
Use the iFVG boxes to identify high-probability zones for entries and liquidity hunts.
Use the manual checklist to evaluate trades based on additional criteria, creating a structured workflow for market analysis.
Fully compatible with your existing iFVG workflow — the core detection and alerts remain unchanged.
Ideal For:
Traders following ICT concepts, liquidity hunts, and structure-based strategies who want to combine automated FVG detection with a manual trade-quality checklist.

BK AK-Flag Formations🏴☠️ BK AK-Flag Formations — Continuation Structure, Tactical Readability. 🏴☠️
Built for traders who press momentum with discipline: it finds flagpoles + flags/pennants, validates the structure, draws the boundaries, and labels it in a way you can act on without clutter.
🎖️ Full Credit — Foundation Engine (Trendoscope)
Original foundation (Trendoscope Flags & Pennants):
The core detection engine (multi-zigzag swing extraction, pivot logic, validation/classification framework, and base drawing architecture) is by Trendoscope.
This script keeps that engine intact. My work adds a tactical execution layer: short tags + tooltip briefing + alert routing + forward border projection.
✅ What This Script Does
This indicator hunts continuation formations after an impulse move, and outputs three things:
Detects the pole (impulse leg) and the consolidation that follows
Classifies the consolidation as a Flag or Pennant, and assigns a bias (Bull/Bear/Neutral) based on context
Draws the structure and labels it cleanly, with optional hover briefings and filtered alerts
You get continuation structure across multiple sensitivities, so it can catch tight flags and larger, slower continuations without changing settings every chart.
🔍 How It Detects (So You Know It’s Not Random)
This is not “pattern art.” It’s rule-based swing logic + geometry:
1) Multi-Zigzag Sweep (micro → macro)
The script runs multiple zigzag levels (up to 4) to extract swings at different sensitivities.
That means the same market is scanned for both:
short, fast consolidations
larger, cleaner consolidations
2) Impulse + Consolidation Validation
After swings are extracted, the engine checks:
that the move qualifies as an impulse “pole”
that the consolidation stays within a controlled retracement window (your Max Retracement control)
that the consolidation geometry is coherent enough to be classified (tolerance controlled by Error Threshold and Flat Threshold)
3) Optional Quality Filters (you control strictness)
Verify Bar Ratio: checks proportion/spacing of pivots, not just price shape
Avoid Overlap: prevents stacking new patterns on top of existing ones
Max Patterns: hard cap so the chart stays readable
Repaint option: allows refinement if better coordinates form (useful for real-time traders)
🧩 BK Enhancements — Why This Publication Exists (Not a Mashup)
This is one pattern engine plus a purpose-built execution layer. Not “two indicators glued together.”
A) Short-Form Pattern Tags (clarity under pressure)
Instead of long labels drowning price, the script can replace them with compact codes:
BF / BeF / BP / BeP / F / P / UF / DF / RF / FF / AF / DeF
This is not cosmetic — it lets you keep structure visible while trading.
B) Tooltip Briefing (optional)
Hover a tag to see:
the full pattern name
the bias (Bullish/Bearish/Neutral)
So you get detail only when you request it, not sprayed across the chart.
C) Alert Routing (signal control, not spam)
Alerts can be filtered by:
Bias (Bull/Bear/Neutral)
Type (Flag vs Pennant)
So you can route only what you trade — e.g., bullish continuations only, or pennants only.
D) Pattern Border Extension (planning the break/retest)
Optional feature extends only the two true boundary lines forward by N bars, so you can plan:
breakout/breakdown levels
retest zones
invalidation outside structure
This extension is selective: it aims to extend the actual borders, not random zigzag legs.
How these work together:
Trendoscope detects/validates → draws the pattern → BK layer converts labels to short tags + applies transparency + tooltip overlay → BK alert router filters by bias/type → BK border extension projects the two boundary lines forward.
That’s the purpose: faster reads + cleaner execution planning.
🏷️ How To Read the Codes (Practical Translation)
BF — Bull Flag: strong pole → controlled pullback → watch boundary break + continuation
BP — Bull Pennant: thrust → tight compression → expansion confirms carry
BeF — Bear Flag: down impulse → weak rallies → breakdown favors continuation lower
BeP — Bear Pennant: pause beneath resistance → release favors trend continuation
F / P: generic tags when it’s valid but shouldn’t over-specify
⚙️ What You Actually Tune
Zigzag lengths/depths: sensitivity (faster vs cleaner)
Max Retracement: how deep consolidation may retrace the pole
Error / Flat thresholds: strictness of structure validation
Overlap / Max patterns: chart cleanliness
Labels: short tags, transparency, tooltips
Border extension: extend boundaries forward by N bars
Alerts: enable + filter by bias and by type
🧑🏫 BK / AK
AK is honor — my mentor’s standard: patience, clarity, no gambling.
All glory to G-d — the true source of wisdom, restraint, and endurance.
👑 King Solomon Lens
“Plans are established by counsel; by wise guidance wage war.” — Proverbs 20:18
Continuation trading is the same: impulse → formation → execution.
BK AK-Flag Formations — when the standard rises, the line advances.
Gd bless. 🙏

BK AK-Warfare Formations👑 BK AK-Warfare Formations — Geometric Structure, Tactical Readability 👑
Built for traders who want validated structure (channels/wedges/triangles) without chart clutter — with compact tags, hover briefings, filtered alerts, and forward-projected battle lines.
🎖️ Full Credit — Foundation Engine (Trendoscope)
Original foundation (Trendoscope Auto Chart Patterns):
The entire pattern engine (multi-zigzag scanning, pivot logic, trendline-pair validation, geometric classification, overlap handling, pattern caps, and the base drawing framework) is by Trendoscope — one of the strongest Pine engineers on TradingView and the creator of the underlying detection architecture.
This script keeps that engine intact. My work is a tactical layer on top: readability + interaction + alerts + forward structure projection.
🧠 What This Script Does (User-Facing Output)
This indicator automatically detects and draws these geometric formations on price:
Channels
AC — Ascending Channel
DC — Descending Channel
RC — Ranging Channel
Wedges
RWE / FWE — Rising/Falling Wedge (Expanding)
RWC / FWC — Rising/Falling Wedge (Contracting)
Triangles
ATC / DTC — Ascending/Descending Triangle (Contracting)
ATE / DTE — Ascending/Descending Triangle (Expanding)
CT — Converging Triangle
DT — Diverging Triangle
You can display either the full pattern name or short tactical tags so structure stays visible without burying price.
🔍 How It Detects (So You Know It’s Not Random)
Trendoscope’s engine follows a strict geometric workflow:
1) Multi-Zigzag Sweep (micro → macro)
The script runs multiple zigzag configurations (up to 4) so it can detect the same market at different swing sensitivities — from tighter formations to broader ones.
2) Pivot Structure Validation (5 or 6 pivots)
A formation is only eligible when the swing sequence provides a valid pivot set (typically 5 or 6 pivots depending on your setting).
3) Trendline-Pair Validation + Geometry Classification
Two boundary trendlines are built and validated:
Upper boundary anchored to pivot highs
Lower boundary anchored to pivot lows
Then the engine measures geometry to classify:
Parallel → Channel
Converging / Diverging with same direction → Wedge
Converging / Diverging with opposing direction → Triangle
4) Quality Controls (optional but recommended)
Error threshold controls tolerance for line fit
Flat threshold controls what qualifies as “flat”
Bar ratio verification checks proportionality of swing spacing
Avoid overlap prevents stacking noisy patterns
Max pattern caps keeps chart readable
Net effect: You get validated geometry, not doodles.
🧩 BK Enhancements — Why This Publication Exists (Not a Mashup)
This publication is not “two indicators glued together.” It’s a single detection engine plus an execution-oriented interface layer built specifically to solve real pain points:
A) Tactical Labels (Clarity Under Pressure)
Short-form tags (AC/DC/RWE/CT…) to keep charts readable
Independent transparency controls (label text + background)
Optional hover tooltips that show full pattern name + directional bias (Bullish/Bearish/Neutral)
How it works together: Trendoscope detects/draws → BK label layer converts to short tags + applies transparency + tooltip overlay.
B) Alert System Upgrades (Signal Routing, Not Spam)
Alerts are filtered by:
Bias: Bullish / Bearish / Neutral
Category: Channel / Wedge / Triangle
So instead of “New Pattern!” noise, you can route only what you trade.
How it works together: When the engine confirms a pattern, BK’s alert router reads the pattern name → derives bias/category → checks your enabled filters → sends only approved alerts.
C) Pattern Border Extension (Forward Battlefield Edges)
Optional feature to extend only the two true boundary lines of the pattern forward by N bars so you can plan:
where price might react
where breaks/retests become obvious
where entries/invalidations belong
This extension logic is selective (it avoids extending zigzag legs/pivot scribbles) and attempts to extend the best-matching border pair only.
How it works together: After patterns are drawn, BK scans existing pattern lines → identifies the border pair → extends those borders forward.
⚙️ Core Controls (What You Actually Tune)
Scanning / Quality
Zigzag lengths & depths (swing sensitivity)
Pivots used: 5 vs 6
Error tolerance + flat threshold
Bar ratio verification
Overlap avoidance + repaint behavior
Max patterns displayed
Display / Readability
Theme colors or custom palette
Transparency for pattern lines/labels
Short labels ON/OFF
Tooltips ON/OFF
Border extension ON/OFF + extend bars
Alerts
Enable alerts overall
Filter by bias
Filter by category (Channel/Wedge/Triangle)
🗺️ How To Use It (Practical, Not Fantasy)
Channels: trade the lane — entries near the boundary, invalidation outside the structure
Wedges: watch compression/expansion and breaks + retests (distribution/accumulation behavior often shows here)
Triangles: plan edges, not the middle — compression → expansion is the whole point
This script gives structure. You still decide execution rules (entry trigger, invalidation, targets).
🧑🏫 BK / AK
AK is honor — my mentor’s standard: patience, clean execution, no gambling.
👑 King Solomon’s Standard
This is warfare—market warfare—so we move by wisdom, not emotion:
“By wise counsel you will wage your own war, and in a multitude of counselors there is safety.” — Proverbs 24:6
BK AK-Warfare Formations — where formation meets judgment, and judgment meets execution.
Gd bless. 🙏

Breakdown Hold (1m) - Manual Level//@version=6
// =============================================================================
// EN — Script Overview
// Name: Breakdown Hold (1m) - Manual Level
// Purpose:
// Detect a simple pattern: price breaks below a manually set level, then
// stabilizes ("holds") within ~1 minute (default) without further dumping.
// When confirmed, it prints "HOLD OK" and triggers an alert.
//
// How it works:
// 1) You input a fixed price Level.
// 2) On the FIRST break below Level (LOW sweep by default), the script "arms".
// 3) For the next N bars on the 1-minute stream (default N=1):
// - If price drops too deep (beyond Max Further Drop), it fails.
// 4) When the window ends:
// - If it did NOT drop too deep AND it bounced from the window low by at
// least Min Bounce (and optional reclaim above Level), it confirms HOLD.
//
// Recommended usage:
// - Works best on a 1-minute chart.
// - If you are on another timeframe, keep "Force 1m Evaluation" enabled
// so the logic still evaluates on 1-minute data.
//
// Alert:
// - Condition title: breakdown_hold_confirm
//
// =============================================================================
// 中文 — 脚本说明
// 名称:Breakdown Hold (1m) - Manual Level
// 用途:
// 识别一个非常简单的“跌破手动固定价位后,约 1 分钟内踩住不再继续下跌”的形态。
// 确认后在图上打出 “HOLD OK”,并触发提醒。
//
// 原理:
// 1) 手动输入固定价位 Level。
// 2) 当价格第一次跌破 Level(默认按 LOW 刺破)后进入监测(armed)。
// 3) 在接下来 N 根 1分钟K(默认 N=1)内:
// - 若继续下探太深(超过允许最大继续下跌幅度),判定失败,不触发。
// 4) 窗口结束时:
// - 若未下探过深,且从窗口最低点出现至少 Min Bounce 的反弹
// (可选要求收盘站回 Level 上方),则判定“踩住确认”。
//
// 推荐用法:
// - 最推荐 1分钟图使用。
// - 如果你在其他周期图上用,请保持 “Force 1m Evaluation” 开启,
// 让判断仍然基于 1分钟数据进行。
//
// 提醒条件:
// - breakdown_hold_confirm
// =============================================================================

Smart Money Zones (FVG + OB) + MTF Trend Panel## Overview
Professional-grade institutional trading zones indicator that identifies **Fair Value Gaps (FVG)** and **Order Blocks (OB)** - key price inefficiencies where smart money operates. Includes a comprehensive **Multi-Timeframe Trend Panel** for complete market context at a glance.
## Core Features
### 🎯 Fair Value Gaps (FVG)
Fair Value Gaps occur when price moves so aggressively that it leaves an "imbalance" or "gap" in the market structure. These zones often act as magnets where price returns to find liquidity.
**Detection Logic:**
- **Bullish FVG**: When current candle's low is above the high of the candle 2 bars ago
- **Bearish FVG**: When current candle's high is below the low of the candle 2 bars ago
- Requires strong impulse candle (configurable body percentage threshold)
- Color-coded zones: Green for bullish, Red for bearish
### 📦 Order Blocks (OB)
Order Blocks represent the last opposite candle before a significant price move - the zone where institutional orders were placed before the breakout.
**Detection Logic:**
- Identifies the last bearish candle before a strong bullish breakout (Bullish OB)
- Identifies the last bullish candle before a strong bearish breakout (Bearish OB)
- Validates breakout strength using ATR multiplier (1.2x default)
- Color-coded zones: Blue for bullish, Orange for bearish
### 📊 Multi-Timeframe Trend Panel
Real-time trend analysis across **7 timeframes** displayed in an elegant dashboard:
- **1 Minute** - Ultra short-term scalping
- **5 Minutes** - Short-term momentum
- **15 Minutes** - Intraday swings
- **30 Minutes** - Session trends
- **1 Hour** - Multi-session trends
- **4 Hours** - Daily structure
- **Daily** - Long-term direction
**Visual Indicators:**
- 🟢 Green circle = Bullish trend
- 🔴 Red circle = Bearish trend
- Clean, professional table design with customizable position and size
## Intelligence Features
### 🧠 Zone Strength Rating
Every zone is automatically classified by strength based on size relative to ATR:
- **VERY STRONG** - 2.0x ATR or more (major institutional zones)
- **STRONG** - 1.5x to 2.0x ATR (significant zones)
- **MEDIUM** - 1.0x to 1.5x ATR (moderate zones)
- **WEAK** - Below 1.0x ATR (minor zones)
Strength rating helps you prioritize which zones to trade from!
### 📉 Smart Mitigation Tracking
Zones automatically track how much they've been "filled" or mitigated:
- Calculates penetration percentage as price enters the zone
- Zones turn **gray** when 50%+ mitigated or fully filled
- Option to **auto-delete** mitigated zones to keep chart clean
- Live zones extend dynamically with price action
### 🎨 Trend Filter (Optional)
When enabled, only shows zones aligned with the current trend:
- Uses customizable MA period (default 50)
- Bullish zones only appear in uptrend
- Bearish zones only appear in downtrend
- Reduces noise and false signals significantly
## Customization Options
### Display Settings
- Toggle FVGs and OBs independently
- Adjust max zones per type (5-200)
- Choose to remove or gray out mitigated zones
- Color customization for all zone types
### Detection Parameters
- **Min Impulse Body %**: Controls how strong the impulse candle must be (0.3-1.0)
- **Order Block Lookback**: How many bars to look back for OB validation (5-50)
- **ATR Length**: Period for ATR calculation (5-50)
### Trend Filter
- Enable/disable trend filtering
- Adjustable MA period for trend determination
### MTF Panel
- Show/hide the trend panel
- 4 position options: Top Right, Top Left, Bottom Right, Bottom Left
- 3 size options: Small, Normal, Large
- Customizable MA period for trend calculation across all timeframes
## Trading Applications
### 1. **Liquidity Grab Entries**
Wait for price to sweep a zone (50%+ mitigation) then enter on reversal. Smart money often "hunts" these zones before the real move begins.
### 2. **Confluence Trading**
Look for zones that align with:
- Multiple timeframe trends showing same direction
- Multiple FVGs/OBs stacking in same area
- Key support/resistance levels
### 3. **Breakout Confirmation**
Use Order Blocks to confirm the strength of breakouts. Strong OBs indicate institutional participation.
### 4. **Retracement Entries**
Enter when price returns to a fresh, unmitigated zone in the direction of the higher timeframe trend.
### 5. **Range Trading**
Identify FVG zones at range extremes - price often reverses at these inefficiencies.
## How It Works
**Fair Value Gaps** form when the middle candle creates such aggressive movement that it leaves a price gap between the high/low of surrounding candles. Institutional traders know these gaps get filled.
**Order Blocks** mark the origin of major moves. The last opposite-colored candle before a breakout is where large orders were placed. Price often returns to these zones for "retests" before continuing.
**Mitigation** happens when price returns to fill these zones. The indicator tracks this automatically, showing you which zones are still "fresh" and which have been used up.
## Best Practices
✅ **Use higher timeframe trends** - Always check the MTF panel before taking trades
✅ **Trade fresh zones** - Unmitigated zones (not gray) have the highest probability
✅ **Combine with price action** - Look for rejection wicks and engulfing candles at zones
✅ **Respect zone strength** - VERY STRONG and STRONG zones are most reliable
✅ **Use trend filter** - Especially on lower timeframes to reduce false signals
❌ **Don't overtrade** - Not every zone will react, wait for confirmation
❌ **Don't ignore context** - Check the MTF panel for conflicting trends
❌ **Don't chase** - Wait for price to come to the zone, don't enter mid-zone
## Technical Details
- **Non-repainting**: All zones are drawn on confirmed candles only
- **Performance optimized**: Uses efficient array management with per-type caps
- **Real-time updates**: Zones extend and track mitigation as price moves
- **Universal compatibility**: Works on all markets and timeframes
## Recommended Settings by Style
**Scalping (1m-5m charts):**
- Max zones: 10-15
- Use trend filter: ON
- MTF Panel: Focus on 1m-15m trends
- Remove mitigated: ON (keep chart clean)
**Day Trading (5m-1H charts):**
- Max zones: 15-20
- Use trend filter: ON
- MTF Panel: Focus on 15m-4H trends
- Remove mitigated: OFF (track zone history)
**Swing Trading (1H-D charts):**
- Max zones: 20+
- Use trend filter: Optional
- MTF Panel: Focus on 1H-1D trends
- Remove mitigated: OFF (important zones persist)
---
## Perfect For
- Smart Money Concept (SMC) traders
- ICT methodology followers
- Institutional order flow traders
- Price action traders seeking key zones
- Multi-timeframe analysis enthusiasts
**Compatible with all markets:** Forex, Crypto, Stocks, Indices, Commodities, Futures
*Trade where the institutions trade. Follow the smart money.*

Session Levels (3of3)This system is designed to strip away market noise and highlight the areas where institutional capital is actually active.
Most retail traders fail because they treat every price movement with equal importance. They often enter trades in the "middle of nowhere" or get trapped by "fakeouts" at standard support/resistance levels.
This tool solves:
Context Blindness: It defines the "playing field" by marking institutional session boundaries (Asia, London, NY), so you know exactly where liquidity resides.
Computation Lag: Standard Volume Profiles often slow down a chart. Our Optimized VPC provides the "Magnet" price without the lag.
Indecision: By requiring a Market Structure Shift (MSS) alongside a Fair Value Gap (FVG), it removes the guesswork of "Is this a reversal or a continuation?"
Why It Is Unique:
Unlike standard indicators that look at a single data point (like just price or just volume), this is a Holistic System.
Auto-Mitigation: Most FVG indicators clutter your screen with old boxes. This tool automatically deletes zones once price "fills" them, keeping your focus on live opportunities.
Institutional "Sweep" Logic: It specifically tracks if price has "stolen" the liquidity from a previous session before issuing a signal.
The "Vegas" Filter: It uses the 144 EMA (Vegas Floor) as a high-probability institutional trend filter, ensuring you aren't fighting the primary trend.
When testing this, track one specific stat: "Did price hit the VPC after the MSS?" You will likely find that even when the trade doesn't reach the far PRZ targets, it reaches the VPC Magnet over 70% of the time. Focusing on that "snap-back" to the orange line is the secret to a high win rate with this tool.
