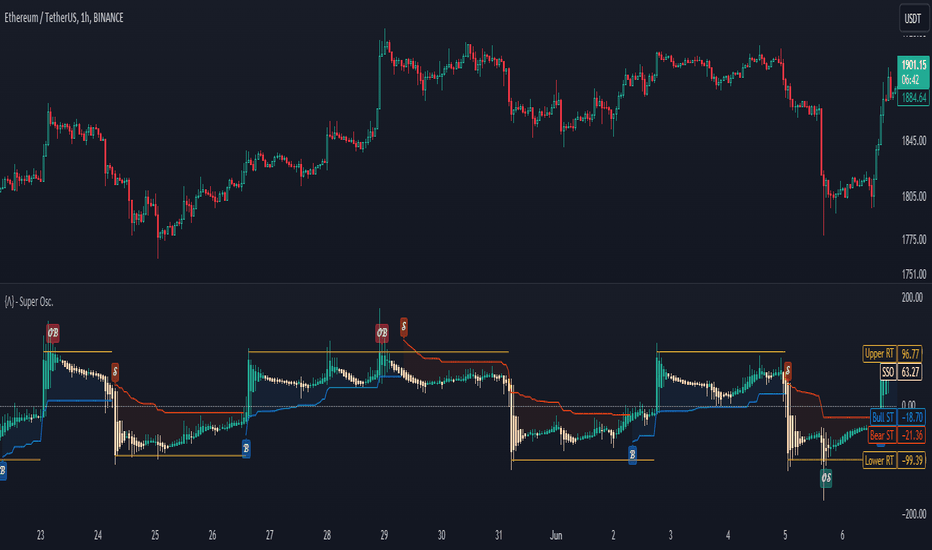
Quantum Probability Matrix AIwww.tradingview.com
Quantum Probability Matrix AI is an advanced probability-based market analysis indicator built to estimate the current balance between bullish and bearish market pressure. Instead of relying on a single technical indicator, it combines multiple independent analytical engines into one unified probability model that continuously evaluates price action, momentum, volatility, participation, trend quality, candle behavior, and market structure.
The purpose of this indicator is to help traders understand which side of the market currently has the statistical advantage by converting multiple technical factors into an easy-to-read probability percentage and visual strength matrix.
This indicator is designed for analytical purposes and does not attempt to predict future prices. Instead, it provides a structured framework that helps traders evaluate current market conditions before making trading decisions.
────────────────────────────────
Why This Indicator Was Created
Most technical indicators focus on only one aspect of the market.
Examples include:
• RSI measures momentum.
• MACD measures momentum shifts.
• ATR measures volatility.
• Moving Averages measure trend direction.
• Volume indicators measure participation.
Each of these provides useful information individually, but none offers a complete picture of the market.
Quantum Probability Matrix AI was created to solve this limitation by combining several analytical models into one intelligent probability engine.
Instead of forcing traders to analyze multiple indicators separately, this indicator converts all major market components into one comprehensive probability score together with detailed breakdowns of each contributing factor.
────────────────────────────────
Purpose of the Indicator
The primary objective of this indicator is to answer several important market questions simultaneously.
How strong is the current trend?
How healthy is the momentum?
Is market participation increasing or decreasing?
Is volatility supporting the move?
Are buyers or sellers currently stronger?
How much confidence exists behind the current direction?
Rather than displaying isolated signals, the indicator presents an overall probability model that reflects the current state of market conditions.
────────────────────────────────
How the Indicator Works
The indicator processes market data through several independent analytical engines.
Each engine evaluates a different aspect of market behavior.
These individual scores are normalized into a common scale before being combined into a weighted probability model.
The final output becomes the Probability Score displayed inside the dashboard.
As market conditions change, every component updates dynamically, causing the overall probability to adjust in real time.
This allows traders to monitor how market conditions evolve rather than relying on static signals.
────────────────────────────────
Momentum Analysis Engine
Momentum measures how aggressively price is moving.
The indicator evaluates several momentum components including:
• Rate of Change
• RSI Position
• MACD Histogram Acceleration
• Price Slope
These values are combined into a Momentum Score.
Higher momentum scores generally indicate stronger directional pressure, while weaker scores may suggest slowing market activity or reduced trend strength.
────────────────────────────────
Trend Analysis Engine
Trend quality is measured using multiple techniques rather than a single moving average.
The indicator evaluates:
• Directional Movement
• ADX Trend Strength
• EMA Alignment
• Trend Slope
These calculations produce a Trend Score representing the strength and quality of the current market trend rather than simply identifying whether price is above or below a moving average.
────────────────────────────────
Volatility Analysis
Volatility plays a major role in determining whether market movements are likely to expand or contract.
The indicator measures:
• ATR
• ATR Expansion
• Volatility Percentile
Periods of expanding volatility often support stronger directional movement, while contracting volatility may indicate consolidation or reduced momentum.
This information contributes to the overall probability calculation.
────────────────────────────────
Volume and Market Participation
Instead of displaying raw volume alone, the indicator estimates market participation by analyzing buying and selling activity relative to recent historical averages.
The participation engine evaluates:
Relative Volume
Estimated Buyer Activity
Estimated Seller Activity
Participation Strength
Markets with increasing participation often produce stronger and more sustainable directional movement compared to low participation environments.
────────────────────────────────
Market Structure Analysis
The structure engine evaluates how price behaves inside its recent trading range.
It continuously monitors:
Higher Highs
Lower Lows
Swing Direction
Breakout Strength
Price Efficiency
These structural components help determine whether buyers or sellers are gaining control of the market.
────────────────────────────────
Candle Strength Analysis
Individual candles contain valuable information regarding market conviction.
The Candle Engine evaluates:
Closing Position
Candle Range
Range Expansion
Relative Candle Strength
Large candles closing near their highs generally indicate stronger buying pressure.
Large candles closing near their lows often indicate stronger selling pressure.
These observations become part of the overall probability calculation.
────────────────────────────────
Mean Reversion Engine
Markets rarely move in one direction forever.
The Mean Reversion Engine measures how far price has deviated from its statistical averages.
It compares price against:
EMA
VWAP
Statistical Z-Score
When price becomes significantly stretched, this engine reduces probability confidence, helping traders recognize when markets may be approaching exhaustion rather than continuation.
────────────────────────────────
Probability Engine
After every analytical engine completes its calculations, the indicator combines all scores into one weighted probability model.
Each analytical component contributes a predefined weight to the final probability.
The result is displayed as:
Probability %
Bullish Strength
Bearish Strength
Overall Market State
Overall Signal
The probability represents the current statistical balance between bullish and bearish market conditions rather than a prediction of future price.
────────────────────────────────
Heatmap Visualization
One of the unique visual features of this indicator is its multi-level probability heatmap.
The heatmap converts probability values into a vertical color matrix.
Lower probability values appear using bearish colors.
Neutral conditions transition through balanced colors.
Higher probability values gradually shift into stronger bullish colors.
This allows traders to identify market strength visually without reading numerical values alone.
────────────────────────────────
Bullish and Bearish Strength Bars
The indicator displays independent Bullish Strength and Bearish Strength bars directly on the chart.
These bars visually represent the current distribution of market probability.
Higher Bullish Strength indicates stronger buying pressure.
Higher Bearish Strength indicates stronger selling pressure.
Rather than generating automatic entries, these bars help traders understand which side currently dominates the market.
────────────────────────────────
Dashboard
The dashboard summarizes every major analytical component in one location.
It displays:
Probability
Momentum Score
Trend Score
Volatility Score
Volume Score
Structure Score
Candle Score
Market State
Overall Signal
Bull Strength
Bear Strength
This allows traders to understand not only the final probability but also the underlying factors contributing to that probability.
────────────────────────────────
Market State
The indicator automatically classifies current market conditions into categories such as:
Strong Bull
Bull
Neutral
Bear
Strong Bear
These classifications simplify complex analytical data into an easy-to-understand market condition.
────────────────────────────────
Works on Any Market
Quantum Probability Matrix AI is designed to operate on virtually every TradingView market including:
• Forex
• Gold
• Silver
• Indices
• Stocks
• Cryptocurrency
• Commodities
• Futures
Because the calculations rely on price behavior rather than instrument-specific rules, the analytical framework remains applicable across different markets.
────────────────────────────────
Works on Any Timeframe
The indicator automatically adapts to every TradingView timeframe.
Examples include:
• 1 Minute
• 3 Minutes
• 5 Minutes
• 15 Minutes
• 30 Minutes
• 1 Hour
• 4 Hour
• Daily
• Weekly
Lower timeframes provide more responsive probability updates, while higher timeframes offer broader trend analysis.
────────────────────────────────
Typical Workflow
A common way to use this indicator is:
Observe the overall Probability Percentage.
Compare Bullish and Bearish Strength.
Review Momentum and Trend Scores.
Confirm whether Volatility supports the current move.
Analyze Structure and Candle Scores.
Evaluate the Market State.
Combine the indicator's analysis with your own trading strategy, market structure, and risk management before making any trading decision.
────────────────────────────────
Key Features
✔ Multi-engine probability model
✔ Dynamic probability calculation
✔ Momentum analysis
✔ Trend strength analysis
✔ Volatility engine
✔ Volume participation analysis
✔ Market structure evaluation
✔ Candle strength analysis
✔ Mean reversion detection
✔ Live probability heatmap
✔ Bullish vs Bearish strength comparison
✔ Real-time analytical dashboard
✔ Customizable visualization
✔ Works across all TradingView markets
✔ Compatible with all timeframes
────────────────────────────────
Important Note
Quantum Probability Matrix AI is designed as a market analysis and decision-support tool. It does not predict future prices, guarantee profitable trades, or generate financial advice. The probability values represent a statistical interpretation of current market conditions based on the indicator's internal analytical model. Traders should always combine this information with their own technical analysis, risk management rules, and trading methodology before entering any position.
────────────────────────────────
Originality & Verification
This indicator is an original concept independently researched, designed, and developed by Forex_Market_Insights. Every analytical engine, probability model, visualization system, dashboard layout, heatmap design, scoring methodology, and implementation has been created specifically for this project. No copyrighted Pine Script source code has been copied, modified, reverse-engineered, or reused from any existing TradingView publication. The script represents original work intended to provide traders with a unique multi-factor probability analysis framework while fully respecting TradingView publishing policies and intellectual property guidelines.
www.tradingview.com Indicador

Volume Profile Supertrend [HexaTrades]Volume Profile Supertrend re-imagines the classic Supertrend. Instead of trailing bands built from pure volatility (ATR), it builds them around the levels where real volume has traded the Point of Control and Value Area.
The philosophy is simple: a normal Supertrend follows volatility; this one follows where the market accepts value. Price tends to gravitate to, and trend away from, the zones where the most business gets done. By anchoring the trend engine to value migration, the indicator aims to stay on the right side of the move while filtering out a portion of low-quality volatility noise.
Everything is computed internally in Pine; no built-in Volume Profile tool is used, so it works on any symbol and timeframe that has volume.
💡How it works
1. Rolling Volume Profile:
It looks back over the last Profile Lookback bars, finds the high–low range, and divides it into Number of Rows price buckets. Every historical bar's volume is distributed across the buckets its range spans, producing a fresh volume distribution on every candle.
2. POC, VAH & VAL:
POC (Point of Control) : the price bucket with the highest traded volume (the "fairest price").
Value Area: the script expands outward from the POC until it captures the chosen Value Area % (default 70%) of total volume.
VAH / VAL: the upper and lower edges of that Value Area.
3. Smoothing & Supertrend bands:
POC, VAH, and VAL are smoothed with EMAs to remove jitter. Two trailing bands are then built, exactly like a Supertrend:
Lower band = smoothed VAL − (ATR × buffer) → support used while bullish.
Upper band = smoothed VAH + (ATR × buffer) → resistance used while bearish.
The bands only trail in the trend-following direction, so they lock in as the price advances.
4. Trend flip:
The trend is bullish while price holds above the lower band, and flips bearish when price closes below it (and vice-versa). The flip is evaluated against the previous bar's confirmed bands, so closed candles never change.
💡How to read it
🔶Bullish:A green line sits below the price. The market is accepting a higher value; treat pullbacks toward the line as the trend "breathing." A flip to red is your warning.
🔶Bearish: A red line sits above the price. Value is migrating lower; rallies into the line are where sellers tend to re-engage. A flip to green signals a potential turn.
🔶Choppy Markets: When price is inside the value area and trend strength is low, the market may be sideways.
In these conditions, signals can be weaker. It may be better to wait for a clear value breakout or stronger trend strength.
🔺Signals
- BUY label prints when the trend flips from bearish to bullish.
- SELL label prints when the trend flips from bullish to bearish.
- A flip dot marks the exact bar of the change on the trend line.
- Trend Strength Filter: Set Minimum Trend Strength above 0 to filter out weak trend flips and display only higher-conviction signals. (Available in the indicator settings.)
┼ Dashboard
-Trend: Current direction Bullish or Bearish.
-Strength: 0–100% conviction score blending distance from POC, POC slope, and whether price has broken outside the Value Area.
-Price Position: Above / Inside / Below Value Area.
-Last Signal: The most recent BUY or SELL that fired.
Alerts
The indicator includes alerts for important events:
-Buy Signal / Sell Signal
-Bullish Trend / Bearish Trend (flip)
-Price Above Value Area / Price Below Value Area
-Price Crossing POC EMA
Suggested Settings
For Intraday Trading
Use lower lookback and medium rows for faster signals.
Example:
-Profile Lookback: 50–100
-Rows: 30–50
-EMA Smoothing: 8–14
-ATR Buffer: 0.5–1.0
For Swing trading
Use higher lookback and smoother settings for cleaner signals.
Example:
-Profile Lookback: 100–250
-Rows: 40–70
-EMA Smoothing: 10–21
-ATR Buffer: 0.8–1.5
For Cleaner Signals
-Increase EMA Smoothing Length
-AIncrease TR Buffer
-Increase Minimum Trend Strength
Volume Profile Supertrend combines the proven structure of a Supertrend with the market's true area of value derived from a rolling Volume Profile. Instead of relying solely on price volatility, it follows the migration of value through the Point of Control (POC) and Value Area (VAH/VAL) to identify higher-quality trend changes.
Whether you're a day trader or swing trader, this indicator helps you visualize trend direction, identify dynamic support and resistance, filter weak reversals, and stay aligned with the prevailing market structure. Use it as a standalone trend-following tool or alongside your existing trading strategy for additional confirmation.
We would love to hear your suggestions. If you have ideas for new features, indicators, analytics, or improvements, please share your feedback. Your input helps guide future updates and improve the indicator for all traders.
This indicator is for educational and analytical purposes only. It is not financial advice. Trading involves risk. Always use proper risk management and combine this indicator with your own analysis before taking any trade.
Indicador

Market Condition Oscillator [HexaTrades]Market Condition Oscillator classifies price action into three simple states: Bullish Trend, Bearish Trend, and Consolidation, and paints them as a color-coded histogram below your chart. It is built to answer one question at a glance: should I be trend-trading right now, or is the market just chopping sideways?
What it shows
🟢 Green histogram above zero → confirmed bullish trend. Taller bars = stronger trend.
🔴 Red histogram below zero → confirmed bearish trend. Deeper bars = stronger trend.
⚪ Gray histogram near zero → consolidation/range (no clear trend).
How it works
The indicator combines four classic, well-understood concepts so that no single signal can produce a false trend on its own:
1. ADX (trend strength): measures how strongly the market is trending. Below the threshold, the market is treated as consolidation regardless of direction.
2. DI+ / DI− (direction) : the Directional Movement pair decides whether strength is to the upside or downside.
3. EMA position + slope (confirmation) : price must be on the correct side of the EMA and the EMA must be sloping the right way. This filters out counter-trend spikes.
4. ATR & EMA-distance (range detection) : consolidation is flagged when volatility compresses or price hugs the EMA, even if ADX hasn't fully dropped yet.
A phase only changes after the condition holds for a configurable number of candles (Confirmation Bars). This is the key to removing the constant flip-flopping that plagues most trend indicators.
Trend rules
✏️ Bullish = ADX above threshold and DI+ > DI− and price above EMA and EMA rising — held for N bars.
✏️Bearish = ADX above threshold and DI− > DI+ and price below EMA and EMA falling — held for N bars.
✏️Consolidation = weak ADX, or compressed ATR, or price hugging the EMA — anything that is not a confirmed trend.
Features
- Bullish, bearish, and consolidation market phase detection.
- Separate oscillator panel for clean chart reading.
- Color-coded histogram.
- Optional histogram smoothing.
- Confirmation bars to reduce false flips.
- Phase label on the latest candle.
- Legend table for easy interpretation.
- Alert conditions for bullish, bearish, consolidation, and trend-flip events.
- Uses confirmed candle data only and does not use future references.
How to use it
- Trend traders: only take longs while the histogram is green, shorts while it is red. Stand aside on gray.
- Mean-reversion traders: the gray phase highlights range conditions where fade/scalp setups work best.
- Filter: combine with your existing entry system and ignore signals that fight the MCO color.
- Works on any market and any timeframe. For higher timeframes, consider raising the ADX threshold and Confirmation Bars.
Alerts
Five ready-to-use alert conditions:
Bullish Trend Started
Bearish Trend Started
Consolidation Started
Bullish → Bearish Shift
Bearish → Bullish Shift
This indicator is designed to help identify market conditions. It should be combined with price action, support and resistance, volume, and proper risk management. No indicator can guarantee profitable trades.
We would love to hear your suggestions. If you have ideas for new features, indicators, analytics, or improvements, please share your feedback. Your input helps guide future updates and improve the indicator for all traders.
This indicator is for educational and analytical purposes only. It should not be considered financial advice. Always use proper risk management and make trading decisions based on your own analysis
Indicador

GARCH Volumetric Cloud [MarkitTick]💡 The GARCH Volumetric Cloud is a highly advanced, institutional-grade trend-following and volatility-tracking indicator designed to filter market noise and pinpoint high-probability trend reversals. By synergizing a dynamic volatility engine inspired by conditional heteroskedasticity models with the smoothing properties of synthetic Heikin-Ashi price action, this tool offers traders a multi-dimensional perspective on market dynamics. It goes beyond simple price crossovers by mathematically confirming that a structural shift in trend is supported by an underlying surge in market volatility. This dual-verification approach significantly reduces the likelihood of entering false breakouts or getting trapped in ranging, low-momentum environments.
✨ Originality and Utility
Standard technical indicators often rely on a single dimension of market data, such as moving averages for trend or the Average True Range for volatility. This script breaks the mold by calculating a real-time variance proxy based on squared logarithmic returns, effectively bridging the gap between academic quantitative finance and retail charting. The originality lies in its "Volatility Gatekeeper" mechanism. The system only validates trend signals when the market is experiencing a mathematically significant expansion in variance, preventing the underlying Heikin-Ashi cloud from signaling entries during dormant or strictly mean-reverting phases.
Furthermore, the script calculates synthetic Heikin-Ashi values internally without relying on secondary chart inputs or delayed security calls. This ensures seamless integration, zero lookahead bias, and absolute synchronization with the current timeframe. It combines this with a fully integrated JSON webhook alert system, making it an all-in-one solution for both manual discretionary traders and automated systematic execution.
🔬 Methodology and Concepts
The core methodology is divided into two distinct processing engines that operate in parallel and converge to generate actionable signals.
● Volatility Engine
The system first determines the period-over-period return, giving the user the option to utilize logarithmic returns for superior statistical normalization.
These returns are squared to calculate raw variance.
To model volatility clustering (the tendency for volatile periods to cluster together), the script applies an Exponentially Weighted Moving Average (EWMA) to the squared returns.
This EWMA acts as a dynamic variance proxy, prioritizing recent market shocks while retaining a memory of historical data, governed by the Lambda decay factor.
The square root of this variance proxy is taken to return the value to a standard volatility scale.
A localized volatility threshold is established by calculating a Simple Moving Average and Standard Deviation of this volatility proxy. A "High Volatility" state is triggered when the current volatility exceeds the moving average plus a user-defined multiple of the standard deviation.
● Trend Cloud Engine
The script derives mathematical Heikin-Ashi price points (Open, High, Low, Close) independently of the user's primary chart type.
Four distinct Exponential Moving Averages (EMAs) are applied sequentially to the synthetic Heikin-Ashi Close price.
The structural trend state is determined by the relationship between the Fast EMA and the Slow EMA.
When the Fast EMA crosses above the Slow EMA, the internal state shifts to Bullish. When it crosses below, the state shifts to Bearish.
🎨 Visual Guide
The visual interface of the indicator is designed to provide immediate situational awareness through color-coded elements and structural bands.
● Synthetic Heikin-Ashi Candles
The indicator plots custom candles directly on the chart, overriding the standard visual noise.
Bullish Theme: Colored in vivid Cyan (#00E5FF) when the underlying cloud structure is in an upward trend.
Bearish Theme: Colored in distinct Pink/Red (#FF3D71) when the underlying cloud structure shifts downward.
The bodies, borders, and wicks are synchronized to these specific themes to maintain a clean visual hierarchy.
● The Moving Average Cloud
Cloud L1 (Fast): Plotted as a solid line with 40 percent opacity.
Cloud L4 (Slow): Plotted as the foundational boundary line, also at 40 percent opacity.
Cloud Spine: A thicker, central moving average derived from the midpoint of the inner EMAs, drawn at 20 percent opacity to serve as a micro-support/resistance level within the broader cloud structure.
Gradient Fills: The space between the four EMA lines is filled with cascading color opacities (50 percent, 65 percent, and 78 percent), creating a three-dimensional visual depth that expands during strong trends and pinches during consolidation.
📖 How to Use
Applying this indicator requires an understanding of its dual-verification logic. It is not designed to trade every crossover, but rather to isolate structural shifts.
● Identifying Opportunities
A valid Long signal occurs when the Fast EMA crosses above the Slow EMA, but only if the previous candle was mathematically classified as being in a "High Volatility" state by the GARCH engine.
A valid Short signal occurs when the Fast EMA crosses below the Slow EMA under the exact same high-volatility prerequisite.
Visually, traders should look for a color shift in the cloud and candles, accompanied by a sharp widening of the cloud structure.
● Automation and Execution
The script calculates a dynamic Stop Loss based on the lowest low of the last 5 bars for long positions, and the highest high of the last 5 bars for short positions.
The Take Profit is mechanically projected using a strict 1:1.5 risk-to-reward ratio based on the calculated Stop Loss distance.
These parameters are packaged into a JSON payload and fired via webhook at the exact moment the signal bar closes and confirms, ensuring zero repainting and immediate execution for connected bots.
⚙️ Inputs and Settings
The indicator provides deep customization options, allowing traders to tune the engines to specific assets and timeframes.
● GARCH Volume Engine
Use EWMA: Toggles between the exponentially weighted variance model and a simple moving average of variance.
Log Returns: Enables logarithmic return calculations for more accurate financial time-series modeling.
Variance Length: Defines the lookback period for the initial variance baseline.
Threshold Lookback: Sets the window for the standard deviation bands applied to the final volatility proxy.
EWMA Lambda: The decay factor for the weighted average. A standard setting of 0.94 mirrors classic RiskMetrics methodology.
High Volatility Band: The standard deviation multiplier required to trigger a "High Volatility" validation state.
● Cloud & Trend Engine
Cloud Fast Length: The lookback for the primary reactive EMA.
Cloud Mid-Fast Length: The first internal structural EMA.
Cloud Mid-Slow Length: The second internal structural EMA.
Cloud Slow Length: The foundational EMA that determines the overall baseline trend.
● Webhook Actions (Automation)
Action Long: The string identifier sent in the JSON payload when a bullish setup is confirmed.
Action Short: The string identifier sent in the JSON payload when a bearish setup is confirmed.
🔍 Deconstruction of the Underlying Scientific and Academic Framework
The architectural foundation of this script is deeply rooted in quantitative financial theory, specifically drawing from time-series econometrics and signal processing. The volatility engine is a deterministic approximation of the Generalized Autoregressive Conditional Heteroskedasticity (GARCH) model. In standard financial mathematics, asset returns do not exhibit constant variance; instead, they experience periods of clustered turbulence and clustered calm.
By calculating the squared log returns, the script isolates the magnitude of price movement independently of directional drift. The application of an Exponentially Weighted Moving Average (EWMA) to these squared returns serves as the conditional variance estimator. The Lambda parameter acts as the memory decay coefficient. By setting this coefficient high (e.g., 0.94), the model ensures that the volatility proxy reacts aggressively to sudden market shocks (such as a macroeconomic data release or institutional block order) while slowly decaying back to the mean, perfectly mirroring the theoretical decay of implied volatility in options pricing.
Parallel to the econometric variance modeling, the script employs a cascaded digital filter design via the Heikin-Ashi EMA cloud. The Heikin-Ashi transformation modifies the standard Open-High-Low-Close data points to incorporate previous period averages, inherently introducing an autoregressive smoothing effect that diminishes high-frequency market noise. By passing this pre-smoothed data through a series of four Exponential Moving Averages, the system applies a multi-pole low-pass filter. The dispersion between the Fast EMA and Slow EMA represents the momentum vector of the trend. The final gating logic, which demands that a structural moving average crossover must be contemporaneous with a statistically significant deviation in the EWMA variance proxy, is a sophisticated method of reducing Type I errors (false positives) in algorithmic trend-following systems.
⚠️ Disclaimer
All provided scripts and indicators are strictly for educational exploration and must not be interpreted as financial advice or a recommendation to execute trades. I expressly disclaim all liability for any financial losses or damages that may result, directly or indirectly, from the reliance on or application of these tools. Market participation carries inherent risk where past performance never guarantees future returns, leaving all investment decisions and due diligence solely at your own discretion. Indicador

VWAP Volatility Bands [BOSWaves]VWAP Volatility Bands - T3-Smoothed VWAP System with Dynamically Scaled Volatility Bands
Overview
VWAP Volatility Bands is a tension-aware trend following system that anchors directional bias to a T3-smoothed Volume Weighted Average Price, where volatility bands dynamically scale with to reflect real market conditions and automatically generate directional signals when price interacts with band extremes.
Instead of relying on raw VWAP lines or static envelope channels, trend state, band visibility, and signal generation are determined through T3-smoothed VWAP direction, ATR-normalized band construction, and score-based logic that surfaces only the most relevant visual context for the current trend.
This creates dynamic volatility boundaries that reflect actual price tension relative to the volume-weighted mean rather than arbitrary fixed offsets - compressing during low-volatility conditions, expanding during high-volatility periods, and capturing overextension signals at band extremes where price demonstrates significant deviation from fair value.
Price is therefore evaluated relative to bands that adapt to volatility dynamics and volume-weighted equilibrium rather than conventional price-only moving averages.
Conceptual Framework
VWAP Volatility Bands is founded on the principle that meaningful trend signals emerge when price maintains position relative to a T3-smoothed VWAP that filters short-term noise, while significant overextension zones form at ATR-scaled distances that reflect genuine volatility rather than static multipliers.
Traditional VWAP approaches plot raw cumulative values without smoothing, making them reactive to short-term volume spikes and difficult to read in trend context. This framework replaces raw VWAP plotting as the primary reference with T3-smoothed VWAP direction, using the raw line only as an optional secondary reference for confluence.
Three core principles guide the design:
Trend direction should be determined by the slope of T3-smoothed VWAP, filtering noise inherent in raw cumulative VWAP readings.
Volatility bands should scale dynamically with ATR, ensuring band distances represent statistically meaningful deviations across varying market conditions.
Only directionally relevant bands should be displayed at any time - bullish bands below during uptrends, bearish bands above during downtrends - reducing visual noise and reinforcing directional context.
This shifts VWAP analysis from a single reference line into a full tension-aware volatility framework with intelligent band management.
Theoretical Foundation
The indicator combines anchored VWAP accumulation, T3 exponential smoothing, Average True Range volatility measurement, slope-based score logic, and overextension signal detection methodology.
A user-configurable VWAP anchor (Session, Week, Month) provides the volume-weighted price reference that resets at meaningful market boundaries, while T3 smoothing applies a six-stage EMA cascade with configurable volume factor to eliminate noise without introducing excessive lag. ATR measurement provides volatility-normalized scaling for band construction. Score logic encodes T3 slope direction into a persistent state that governs band visibility and bar coloring.
Four internal systems operate in tandem:
VWAP Accumulation Engine : Computes cumulative volume-weighted typical price across the selected anchor period, resetting at session, weekly, or monthly boundaries.
T3 Smoothing System : Applies six-stage EMA cascade with configurable length and volume factor to produce a smooth, low-lag trend baseline from raw VWAP.
ATR Band Construction : Scales four band pairs above and below T3 baseline using fixed ATR multipliers (0.5, 1.0, 1.5, 2.2) to define volatility zones of increasing significance.
Score and Signal Engine : Tracks T3 slope direction as a persistent score state, governs which band set is displayed, generates entry diamonds at slope changes, and fires TP signals at band extreme crossovers.
This design allows volatility boundaries to reflect actual market tension relative to volume-weighted fair value rather than reacting mechanically to price-only calculations.
How It Works
VWAP Volatility Bands evaluates price through a sequence of volume-weighted, tension-aware processes:
Anchor Reset Detection : System identifies session, weekly, or monthly boundaries and resets cumulative volume and volume-weighted price accumulators accordingly.
VWAP Accumulation : Typical price multiplied by volume accumulates alongside raw volume across the anchor period, producing a continuously updating raw VWAP value.
T3 Smoothing : Raw VWAP passes through a six-EMA T3 cascade using configurable length and factor parameters, producing a smooth directional baseline.
ATR Calculation : 14-period ATR provides volatility-normalized distance measurement for all band construction.
Band Calculation : Four upper and four lower bands are computed at 0.5, 1.0, 1.5, and 2.2 ATR distances from the T3 baseline.
Score Assignment : T3 slope is evaluated each bar; rising slope sets score to +1 (bullish), falling slope sets score to -1 (bearish), flat slope persists prior state.
Directional Band Display : Score +1 renders lower bands only; score -1 renders upper bands only, ensuring only contextually relevant zones are visible.
Gradient Fill Construction : Progressive opacity fills between band pairs create a visual tension gradient, with outer fill intensity scaling dynamically based on price proximity to the extreme band.
Entry Signal Generation : T3 slope crossover (bullish) plots a diamond at the lower extreme band; T3 slope crossunder (bearish) plots a diamond at the upper extreme band.
TP Signal Generation : Price closing beyond the outer band against the current trend direction triggers a take-profit marker, identifying overextension relative to the volatility envelope.
Bar Coloring : Each bar is tinted based on trend score and distance from T3 baseline, with intensity scaling proportionally to deviation up to the outer band distance.
Together, these elements form a continuously updating volatility framework anchored in volume-weighted price dynamics and ATR-normalized tension measurement.
Interpretation
VWAP Volatility Bands should be interpreted as volume-anchored volatility boundaries with automated overextension detection:
Bullish Trend State (Green) : Established when T3-smoothed VWAP slope is rising, with lower volatility bands displayed as dynamic support zones beneath price.
Bearish Trend State (Red) : Established when T3-smoothed VWAP slope is falling, with upper volatility bands displayed as dynamic resistance zones above price.
Elastic Cloud : Progressive gradient fills between band pairs create a visual tension zone, with outer fill darkening as price pushes toward the extreme band.
Raw VWAP Line : Optional dotted reference displaying the unsmoothed cumulative VWAP for confluence analysis against the T3 baseline.
Tension Dynamics : Price operating near T3 baseline indicates low tension and equilibrium; price near outer bands (2.2 ATR) indicates high tension and potential overextension.
◆ Entry Signals : Green diamond at lower band marks T3 slope turning bullish; red diamond at upper band marks T3 slope turning bearish, indicating directional momentum shifts.
⬨ TP Signals : Take-profit markers appear when price closes beyond the outer band against the prevailing trend direction, signaling potential exhaustion and mean reversion opportunity.
Colored Candles : Bar tinting reflects current trend state and distance from T3 baseline, with gray bars near the baseline and full-color bars at maximum tension distance.
T3 slope direction, band interaction, and tension proximity outweigh isolated price movements when interpreting the indicator.
Signal Logic & Visual Cues
VWAP Volatility Bands presents three primary interaction signals:
Buy Signal (◆) : Green diamond appears at the lower extreme band when T3-smoothed VWAP slope crosses upward, suggesting bullish momentum shift with lower volatility bands now acting as dynamic support structure.
Sell Signal (◆) : Red diamond displays at the upper extreme band when T3-smoothed VWAP slope crosses downward, indicating bearish momentum shift with upper volatility bands now acting as dynamic resistance structure.
Take Profit Signal (⬨) : Small markers appear when price crosses beyond the outer extreme band against the prevailing trend direction, identifying overextension relative to the ATR-normalized volatility envelope and suggesting potential mean reversion back toward the T3 baseline.
Band gradient intensity provides continuous visual feedback on tension buildup without requiring separate oscillator panels.
Alert generation covers trend state switches (bullish/bearish entry signals) and take-profit occurrences for systematic monitoring.
Strategy Integration
VWAP Volatility Bands fits within adaptive trend-following and volatility-envelope approaches:
Band-Based Position Management : Use inner bands (0.5–1.0 ATR) as continuation zones and outer bands (1.5–2.2 ATR) as overextension warnings during active trends.
TP Signal Profit-Taking : Scale out of positions when price triggers outer band TP signals, as these mark statistically significant deviation from the volume-weighted mean.
T3 Baseline Re-entry : Look for re-entry opportunities when price pulls back toward T3 baseline during trending conditions without breaching trend direction.
Raw VWAP Confluence : Use optional raw VWAP display alongside T3 baseline to identify alignment between smoothed and unsmoothed references as higher-confidence zones.
Tension-Aware Sizing : Reduce position sizing when price operates near outer bands as overextension conditions carry elevated mean-reversion risk.
Anchor Period Selection : Match VWAP anchor to trading timeframe - Session for intraday, Week for swing, Month for position trading - to ensure volume weighting reflects relevant market participation.
Multi-Timeframe Confirmation : Apply higher-timeframe VWAP Volatility Bands trend state as directional filter for lower-timeframe entry precision, entering only when T3 slopes align across timeframes.
Technical Implementation Details
Core Engine : Anchored VWAP accumulation with configurable reset boundary (Session, Week, Month) and T3-smoothed baseline
Smoothing Model : Six-stage EMA cascade (T3) with configurable length and volume factor parameters
Band Model : Four ATR-scaled band pairs at fixed multipliers (0.5, 1.0, 1.5, 2.2) from T3 baseline
Score System : Persistent slope-based directional state with single-bar crossover detection
Visualization : Progressive gradient fills with dynamic outer opacity, directional bar coloring scaling with tension distance
Signal Logic : Slope crossover entry diamonds at outer band level, outer band breach TP markers with directional filtering
Performance Profile : Optimized for real-time execution across all timeframes with efficient cumulative accumulation logic
Optimal Application Parameters
Timeframe Guidance:
1 - 5 min : Intraday scalping with Session anchor and responsive T3 length settings
15 - 60 min : Intraday momentum following with Session or Week anchor for balanced band behavior
4H - Daily : Swing-level trend identification with Week or Month anchor for sustained volatility context
Suggested Baseline Configuration:
VWAP Anchor : Session
T3 Length : 28
T3 Factor : 0.7
ATR Length : 14
Show Raw VWAP : Enabled
Show TP Signals : Enabled
Color Bars : Enabled
Bullish Color : Bright Green (#00FF44)
Bearish Color : Pink-Red (#FF0066)
These suggested parameters should be used as a baseline; their effectiveness depends on the asset's volatility profile, trending characteristics, and anchor period alignment with the trading timeframe, so fine-tuning is expected for optimal performance.
Parameter Calibration Notes
Use the following adjustments to refine behavior without altering the core logic:
T3 too slow/fast : Adjust T3 Length to control smoothing speed - lower values produce a more responsive baseline with earlier slope changes, higher values create a smoother baseline with more persistent trend states.
T3 too smooth/jagged : Adjust T3 Factor between 0.0 and 1.0 - higher values increase smoothness with additional lag, lower values reduce lag at the cost of more noise in the baseline.
Bands too wide/narrow : Adjust ATR Length to control band scaling - lower values make bands more reactive to recent volatility, higher values produce more stable band distances.
Too many TP signals : TP signals fire at the 2.2 ATR outer band by design; if frequency is excessive, consider increasing ATR Length to stabilize the outer band distance.
VWAP anchor misaligned : Switch anchor period to match the dominant trading session or timeframe - Session for intraday, Week for multi-day swing, Month for longer-term positioning.
Excessive bar color noise : Disable Color Bars to remove tinting and focus purely on band and signal interaction without bar-level visual feedback.
Raw VWAP divergence : Large gaps between raw VWAP and T3 baseline indicate high smoothing lag; reduce T3 Length or Factor to bring baseline closer to raw VWAP in fast-moving conditions.
Adjustments should be incremental and evaluated across multiple session types rather than isolated market conditions.
Performance Characteristics
High Effectiveness:
Trending markets with sustained directional movement away from the volume-weighted mean
Instruments with consistent intraday volume profiles where VWAP anchoring provides meaningful fair value reference
Momentum continuation strategies using inner bands as dynamic support/resistance during active trends
Overextension identification approaches benefiting from ATR-normalized outer band signals at tension extremes
Session-based trading where VWAP anchor resets align with institutional volume participation boundaries
Reduced Effectiveness:
Choppy, range-bound markets with frequent T3 slope reversals producing whipsaw entry signals
Low-volume instruments where VWAP accumulation becomes distorted by thin participation and erratic volume spikes
Pre-market or extended-hours sessions where volume profiles differ significantly from regular session dynamics
Highly gapped markets where price discontinuities bypass band interaction logic between sessions
Consolidation and sideways price action where trend-following methodologies inherently struggle due to lack of sustained directional movement
Integration Guidelines
Confluence : Combine with BOSWaves structure analysis, momentum oscillators, or volume profile tools for multi-factor confirmation
Band Respect : Honor outer band TP signals as primary overextension alerts - consider reducing exposure when price reaches 2.2 ATR deviation from T3 baseline
Baseline Awareness : Monitor price relationship to T3 baseline as the primary equilibrium reference - sustained distance indicates trend conviction, proximity indicates consolidation
Tension Monitoring : Track band gradient intensity to identify building tension conditions that may precede acceleration or reversal
Anchor Discipline : Maintain consistent anchor period selection aligned with the primary trading timeframe rather than switching anchors to fit recent price behavior
State Discipline : Maintain directional bias aligned with current T3 slope state until a confirmed slope reversal occurs
Multi-Timeframe Alignment : Use higher timeframe T3 slope direction as a filter for lower timeframe entries to ensure confluence across time horizons
Disclaimer
VWAP Volatility Bands is a professional-grade trend following and volatility band system. It uses T3-smoothed VWAP with ATR-normalized band construction but does not predict future price movements. Results depend on market conditions, volatility characteristics, anchor period selection, and disciplined execution. BOSWaves recommends deploying this indicator within a broader analytical framework that incorporates price structure, volume context, and comprehensive risk management. Indicador

Indicador

Indicador

Indicador

Fib and Slope Trend Detector [EWT] + MTF Dashboard🚀 Overview
The Momentum Structure Trend Detector is a sophisticated trend-following tool that combines Price Velocity (Slope) with Market Structure (Fibonacci) to identify high-probability trend reversals and continuations.
Unlike traditional indicators that rely heavily on lagging moving averages, this script analyzes the speed of price action in real-time. It operates on the core principle of market structure: Impulse moves are fast and steep, while corrections are slow and shallow.
🧠 The Logic: Physics Meets Market Structure
This indicator determines the trend direction by calculating the Slope (Velocity) of price swings.
ZigZag Calculation: It first identifies market swings (Highs and Lows) using a standard pivot detection algorithm.
Slope Calculation: It calculates the velocity of every completed leg using the formula: $Slope = \frac{|Price Change|}{|Time Duration|}$.
Trend Definition:
Uptrend : If the previous Up-move was fast (Impulse) and the subsequent Down-move is slower (Correction), the market is primed for an uptrend.
Downtrend : If the previous Down-move was fast (Impulse) and the subsequent Up-move is slower (Correction), the market is primed for a downtrend.
🔥 Key Features
1. Aggressive Real-Time Detection (No Lag)
Most structure indicators wait for a "Higher High" to confirm a trend, which often leads to late entries. This script uses an Aggressive Live Slope calculation:
It compares the current developing slope of the live price action against the slope of the previous completed leg.
Result: As soon as the current move becomes "steeper" (faster) than the previous correction, the trend flips immediately. This allows you to catch the "meat" of the move before a new pivot is even confirmed.
2. Fibonacci Validity Filter
Momentum alone isn't enough; we need structural integrity.
The script calculates the 78.6% Retracement level of the impulse leg.
If a correction moves deeper than this Fibonacci limit (on a closing basis), the trend structure is considered "broken" or "invalid," and the indicator switches to a Neutral state. This filters out choppy/ranging markets.
3. Multi-Timeframe (MTF) Dashboard
A customizable dashboard on the chart allows for fractal analysis. You can view the trend state (UP/DOWN/NEUTRAL) across 9 different timeframes (1m to 1M) simultaneously.
Green Row : Uptrend
Red Row : Downtrend
Gray : Neutral/Indeterminate
4. Smart Visuals
Background Colo r: Changes dynamically (Teal for Bullish, Red for Bearish, Gray for Neutral) to give you an instant read of the market state.
Slope Labels : Displays the calculated numeric slope on the chart, helping you visualize the momentum difference between impulse and corrective waves.
Invalidation Levels : Automatically plots the invalidation line (Stop Loss level) based on the market structure.
🛠️ Settings & Inputs
Strategy Settings
Pivot Deviation Length : Sensitivity of the ZigZag calculation (Default: 5). Lower numbers = more sensitive to small swings.
Max Retracement % : The Fibonacci limit for a valid correction (Default: 78.6%).
Min Bars for Live Calc : To prevent noise, the script waits for this many bars after a pivot before calculating the "Live Slope" (Default: 3).
Dashboard Settings
Show Dashboard : Toggle the table on/off.
Timeframe Toggles : Enable/Disable specific timeframes (1m, 5m, 15m, 30m, 1H, 4H, 1D, 1W, 1M) to suit your trading style.
🎯 How to Use
Wait for Background Change : When the background turns Teal, it indicates that a corrective pullback has ended and a new impulse with high velocity has begun.
Check Invalidation : Look at the plotted Stop Loss Level. If price closes below this line, the trade idea is invalid.
Confirm with Dashboard : Use the table to ensure the higher timeframes (e.g., 1H, 4H) align with your current chart's direction for higher probability setups.
Disclaimer : This tool is designed for trend analysis and educational purposes. Past performance (momentum) is not indicative of future results. Always manage your risk. Indicador

Smart Money Precision Structure [BullByte]Smart Money Precision Structure
Advanced Market Structure Analysis Using Institutional Order Flow Concepts
---
OVERVIEW
Smart Money Precision Structure (SMPS) is a comprehensive market analysis indicator that combines six analytical frameworks to identify high-probability market structure patterns. The indicator uses multi-dimensional scoring algorithms to evaluate market conditions through institutional order flow concepts, providing traders with professional-grade market analysis.
---
PURPOSE AND ORIGINALITY
Why This Indicator Was Developed
• Addresses the gap between retail and institutional analysis methods
• Consolidates multiple analysis techniques that professionals use separately
• Automates complex market structure evaluation into actionable insights
• Eliminates the need for multiple indicators by providing comprehensive analysis
What Makes SMPS Original
• Six-Layer Confluence System - Unique combination of market regime, structure, volume flow, momentum, price action, and adaptive filtering
• Institutional Pattern Recognition - Identifies smart money accumulation and distribution patterns
• Adaptive Intelligence - Parameters automatically adjust based on detected market conditions
• Real-Time Market Scoring - Proprietary algorithm rates market quality from 0-100%
• Structure Break Detection - Advanced pivot analysis identifies trend reversals early
---
HOW IT WORKS - TECHNICAL METHODOLOGY
1. Market Regime Analysis Engine
The indicator evaluates five core market dimensions:
• Volatility Score - Measures current volatility against 50-period historical baseline
• Trend Score - Analyzes alignment between 8, 21, and 50-period EMAs
• Momentum Score - Combines RSI divergence with MACD signal alignment
• Structure Score - Evaluates pivot point formation clarity
• Efficiency Score - Calculates directional movement efficiency ratio
These scores combine to classify markets into five regimes:
• TRENDING - Strong directional movement with aligned indicators
• RANGING - Sideways movement with mixed directional signals
• VOLATILE - Elevated volatility with unpredictable price swings
• QUIET - Low volatility consolidation periods
• TRANSITIONAL - Market shifting between different regimes
2. Market Structure Analysis
Advanced pivot point analysis identifies:
• Higher Highs and Higher Lows for bullish structure
• Lower Highs and Lower Lows for bearish structure
• Structure breaks when established patterns fail
• Dynamic support and resistance from recent pivot points
• Key level proximity detection using ATR-based buffers
3. Volume Flow Decoding
Institutional activity detection through:
• Volume surge identification when volume exceeds 2x average
• Buy versus sell pressure analysis using price-volume correlation
• Flow strength measurement through directional volume consistency
• Divergence detection between volume and price movements
• Institutional threshold alerts when unusual volume patterns emerge
4. Multi-Period Momentum Synthesis
Weighted momentum calculation across four timeframes:
• 1-period momentum weighted at 40%
• 3-period momentum weighted at 30%
• 5-period momentum weighted at 20%
• 8-period momentum weighted at 10%
Result smoothed with 6-period EMA for noise reduction.
5. Price Action Quality Assessment
Each bar evaluated for:
• Range quality relative to 20-period average
• Body-to-range ratio for directional conviction
• Wick analysis for rejection pattern identification
• Pattern recognition including engulfing and hammer formations
• Sequential price movement analysis
6. Adaptive Parameter System
Parameters automatically adjust based on detected regime:
• Trending markets reduce sensitivity and confirmation requirements
• Volatile markets increase filtering and require additional confirmations
• Ranging markets maintain neutral settings
• Transitional markets use moderate adjustments
---
COMPLETE SETTINGS GUIDE
Section 1: Core Analysis Settings
Analysis Sensitivity (0.3-2.0)
• Default: 1.0
• Lower values require stronger price movements
• Higher values detect more subtle patterns
• Scalpers use 0.8-1.2, swing traders use 1.5-2.0
Noise Reduction Level (2-7)
• Default: 4
• Controls filtering of false patterns
• Higher values reduce pattern frequency
• Increase in volatile markets
Minimum Move % (0.05-0.50)
• Default: 0.15%
• Sets minimum price movement threshold
• Adjust based on instrument volatility
• Forex: 0.05-0.10%, Stocks: 0.15-0.25%, Crypto: 0.20-0.50%
High Confirmation Mode
• Default: True (Enabled)
• Requires all technical conditions to align
• Reduces frequency but increases reliability
• Disable for more aggressive pattern detection
Section 2: Market Regime Detection
Enable Regime Analysis
• Default: True (Enabled)
• Activates market environment evaluation
• Essential for adaptive features
• Keep enabled for best results
Regime Analysis Period (20-100)
• Default: 50 bars
• Determines regime calculation lookback
• Shorter for responsive, longer for stable
• Scalping: 20-30, Swing: 75-100
Minimum Market Clarity (0.2-0.8)
• Default: 0.4
• Quality threshold for pattern generation
• Higher values require clearer conditions
• Lower for more patterns, higher for quality
Adaptive Parameter Adjustment
• Default: True (Enabled)
• Enables automatic parameter optimization
• Adjusts based on market regime
• Highly recommended to keep enabled
Section 3: Market Structure Analysis
Enable Structure Validation
• Default: True (Enabled)
• Validates patterns against support/resistance
• Confirms trend structure alignment
• Essential for reliability
Structure Analysis Period (15-50)
• Default: 30 bars
• Period for structure pattern analysis
• Affects support/resistance calculation
• Match to your trading timeframe
Minimum Structure Alignment (0.3-0.8)
• Default: 0.5
• Required structure score for valid patterns
• Higher values need stronger structure
• Balance with desired frequency
Section 4: Analysis Configuration
Minimum Strength Level (3-5)
• Default: 4
• Minimum confirmations for pattern display
• 5 = Maximum reliability, 3 = More patterns
• Beginners should use 4-5
Required Technical Confirmations (4-6)
• Default: 5
• Number of aligned technical factors
• Higher = fewer but better patterns
• Works with High Confirmation Mode
Pattern Separation (3-20 bars)
• Default: 8 bars
• Minimum bars between patterns
• Prevents clustering and overtrading
• Increase for cleaner charts
Section 5: Technical Filters
Momentum Validation
• Default: True (Enabled)
• Requires momentum alignment
• Filters counter-trend patterns
• Essential for trend following
Volume Confluence Analysis
• Default: True (Enabled)
• Requires volume confirmation
• Identifies institutional participation
• Critical for reliability
Trend Direction Filter
• Default: True (Enabled)
• Only shows patterns with trend
• Reduces counter-trend signals
• Disable for reversal hunting
Section 6: Volume Flow Analysis
Institutional Activity Threshold (1.2-3.5)
• Default: 2.0
• Multiplier for unusual volume detection
• Lower finds more institutional activity
• Stock: 2.0-2.5, Forex: 1.5-2.0, Crypto: 2.5-3.5
Volume Surge Multiplier (1.8-4.5)
• Default: 2.5
• Defines significant volume increases
• Adjust per instrument characteristics
• Higher for stocks, lower for forex
Volume Flow Period (12-35)
• Default: 18 bars
• Smoothing for volume analysis
• Shorter = responsive, longer = smooth
• Match to timeframe used
Section 7: Analysis Frequency Control
Maximum Analysis Points Per Hour (1-5)
• Default: 3
• Limits pattern frequency
• Prevents overtrading
• Scalpers: 4-5, Swing traders: 1-2
Section 8: Target Level Configuration
Target Calculation Method
• Default: Market Adaptive
• Three modes available:
- Fixed: Uses set point distances
- Dynamic: ATR-based calculations
- Market Adaptive: Structure-based levels
Minimum Target/Risk Ratio (1.0-3.0)
• Default: 1.5
• Minimum acceptable reward vs risk
• Higher filters lower probability setups
• Professional standard: 1.5-2.0
Fixed Mode Settings:
• Fixed Target Distance: 50 points default
• Fixed Invalidation Distance: 30 points default
• Use for consistent instruments
Dynamic Mode Settings:
• Dynamic Target Multiplier: 1.8x ATR default
• Dynamic Invalidation Multiplier: 1.0x ATR default
• Adapts to volatility automatically
Market Adaptive Settings:
• Use Structure Levels: True (default)
• Structure Level Buffer: 0.1% default
• Places levels at actual support/resistance
Section 9: Visual Display Settings
Color Theme Options
• Professional (Teal/Red)
- Bullish: Teal (#26a69a)
- Bearish: Red (#ef5350)
- Neutral: Gray (#78909c)
- Best for: Traditional traders, clean appearance
• Dark (Neon Green/Pink)
- Bullish: Neon Green (#00ff88)
- Bearish: Hot Pink (#ff0044)
- Neutral: Dark Gray (#333333)
- Best for: Dark theme users, high contrast
• Light (Green/Red Classic)
- Bullish: Green (#4caf50)
- Bearish: Red (#f44336)
- Neutral: Light Gray (#9e9e9e)
- Best for: Light backgrounds, traditional colors
• Vibrant (Cyan/Magenta)
- Bullish: Cyan (#00ffff)
- Bearish: Magenta (#ff00ff)
- Neutral: Medium Gray (#888888)
- Best for: High visibility, modern appearance
Dashboard Position
• Options: Top Left, Top Right, Bottom Left, Bottom Right, Middle Left, Middle Right
• Default: Top Right
• Choose based on chart layout preference
Dashboard Size
• Full: Complete information display (desktop)
• Mobile: Compact view for small screens
• Default: Full
Analysis Display Style
• Arrows : Simple directional markers
• Labels : Detailed text information
• Zones : Colored areas showing pattern regions
• Default: Labels (most informative)
Display Options:
• Display Analysis Strength: Shows star rating
• Display Target Levels: Shows target/invalidation lines
• Display Market Regime: Shows regime in pattern labels
---
HOW TO USE SMPS - DETAILED GUIDE
Understanding the Dashboard
Top Row - Header
• SMPS Dashboard title
• VALUE column: Current readings
• STATUS column: Condition assessments
Market Regime Row
• Shows: TRENDING, RANGING, VOLATILE, QUIET, or TRANSITIONAL
• Color coding: Green = Favorable, Red = Caution
• Status: FAVORABLE or CAUTION trading conditions
Market Score Row
• Percentage from 0-100%
• Above 60% = Strong conditions
• 40-60% = Moderate conditions
• Below 40% = Weak conditions
Structure Row
• Direction: BULLISH, BEARISH, or NEUTRAL
• Status: INTACT or BREAK
• Orange BREAK indicates structure failure
Volume Flow Row
• Direction: BUYING or SELLING
• Intensity: STRONG or WEAK
• Color indicates dominant pressure
Momentum Row
• Numerical momentum value
• Positive = Upward pressure
• Negative = Downward pressure
Volume Status Row
• INST = Institutional activity detected
• HIGH = Above average volume
• NORM = Normal volume levels
Adaptive Mode Row
• ACTIVE = Parameters adjusting
• STATIC = Fixed parameters
• Shows required confirmations
Analysis Level Row
• Minimum strength level setting
• Pattern separation in bars
Market State Row
• Current analysis: BULLISH, BEARISH, NEUTRAL
• Shows analysis price level when active
T:R Ratio Row
• Current target to risk ratio
• GOOD = Meets minimum requirement
• LOW = Below minimum threshold
Strength Row
• BULL or BEAR dominance
• Numerical strength value 0-100
Price Row
• Current price
• Percentage change
Last Analysis Row
• Previous pattern direction
• Bars since last pattern
Reading Pattern Signals
Bullish Structure Pattern
• Upward triangle or "Bullish Structure" label
• Star rating shows strength (★★★★★ = strongest)
• Green line = potential target level
• Red dashed line = invalidation level
• Appears below price bars
Bearish Structure Pattern
• Downward triangle or "Bearish Structure" label
• Star rating indicates reliability
• Green line = potential target level
• Red dashed line = invalidation level
• Appears above price bars
Pattern Strength Interpretation
• ★★★★★ = 6 confirmations (exceptional)
• ★★★★☆ = 5 confirmations (strong)
• ★★★☆☆ = 4 confirmations (moderate)
• ★★☆☆☆ = 3 confirmations (minimum)
• Below minimum = filtered out
Visual Elements on Chart
Lines and Levels:
• Gray Line = 21 EMA trend reference
• Green Stepline = Dynamic support level
• Red Stepline = Dynamic resistance level
• Green Solid Line = Active target level
• Red Dashed Line = Active invalidation level
Pattern Markers:
• Triangles = Arrow display mode
• Text Labels = Label display mode
• Colored Boxes = Zone display mode
Target Completion Labels:
• "Target" = Price reached target level
• "Invalid" = Pattern invalidated by price
---
RECOMMENDED USAGE BY TIMEFRAME
1-Minute Charts (Scalping)
• Sensitivity: 0.8-1.2
• Noise Reduction: 3-4
• Pattern Separation: 3-5 bars
• High Confirmation: Optional
• Best for: Quick intraday moves
5-Minute Charts (Precision Intraday)
• Sensitivity: 1.0 (default)
• Noise Reduction: 4 (default)
• Pattern Separation: 8 bars
• High Confirmation: Enabled
• Best for: Day trading
15-Minute Charts (Short Swing)
• Sensitivity: 1.0-1.5
• Noise Reduction: 4-5
• Pattern Separation: 10-12 bars
• High Confirmation: Enabled
• Best for: Intraday swings
30-Minute to 1-Hour (Position Trading)
• Sensitivity: 1.5-2.0
• Noise Reduction: 5-7
• Pattern Separation: 15-20 bars
• Regime Period: 75-100
• Best for: Multi-day positions
Daily Charts (Swing Trading)
• Sensitivity: 1.8-2.0
• Noise Reduction: 6-7
• Pattern Separation: 20 bars
• All filters enabled
• Best for: Long-term analysis
---
MARKET-SPECIFIC SETTINGS
Forex Pairs
• Minimum Move: 0.05-0.10%
• Institutional Threshold: 1.5-2.0
• Volume Surge: 1.8-2.2
• Target Mode: Dynamic or Market Adaptive
Stock Indices (ES, NQ, YM)
• Minimum Move: 0.10-0.15%
• Institutional Threshold: 2.0-2.5
• Volume Surge: 2.5-3.0
• Target Mode: Market Adaptive
Individual Stocks
• Minimum Move: 0.15-0.25%
• Institutional Threshold: 2.0-2.5
• Volume Surge: 2.5-3.5
• Target Mode: Dynamic
Cryptocurrency
• Minimum Move: 0.20-0.50%
• Institutional Threshold: 2.5-3.5
• Volume Surge: 3.0-4.5
• Target Mode: Dynamic
• Increase noise reduction
---
PRACTICAL APPLICATION EXAMPLES
Example 1: Strong Trending Market
Dashboard Reading:
• Market Regime: TRENDING
• Market Score: 75%
• Structure: BULLISH, INTACT
• Volume Flow: BUYING, STRONG
• Momentum: +0.45
Interpretation:
• Strong uptrend environment
• Institutional buying present
• Look for bullish patterns as continuation
• Higher probability of success
• Consider using lower sensitivity
Example 2: Range-Bound Conditions
Dashboard Reading:
• Market Regime: RANGING
• Market Score: 35%
• Structure: NEUTRAL
• Volume Flow: SELLING, WEAK
• Momentum: -0.05
Interpretation:
• No clear direction
• Low opportunity environment
• Patterns are less reliable
• Consider waiting for regime change
• Or switch to a range-trading approach
Example 3: Structure Break Alert
Dashboard Reading:
• Previous: BULLISH structure
• Current: Structure BREAK
• Volume: INST flag active
• Momentum: Shifting negative
Interpretation:
• Trend reversal potentially beginning
• Institutional participation detected
• Watch for bearish pattern confirmation
• Adjust bias accordingly
• Increase caution on long positions
Example 4: Volatile Market
Dashboard Reading:
• Market Regime: VOLATILE
• Market Score: 45%
• Adaptive Mode: ACTIVE
• Confirmations: Increased to 6
Interpretation:
• Choppy conditions
• Parameters auto-adjusted
• Fewer but higher quality patterns
• Wider stops may be needed
• Consider reducing position size
Below are a few chart examples of the Smart Money Precision Structure (SMPS) indicator in action.
• Example 1 – Bullish Structure Detection on SOLUSD 5m
• Example 2 – Bearish Structure Detected with Strong Confluence on SOLUSD 5m
---
TROUBLESHOOTING GUIDE
No Patterns Appearing
Check these settings:
• High Confirmation Mode may be too restrictive
• Minimum Strength Level may be too high
• Market Clarity threshold may be too high
• Regime filter may be blocking patterns
• Try increasing sensitivity
Too Many Patterns
Adjust these settings:
• Enable High Confirmation Mode
• Increase Minimum Strength Level to 5
• Increase Pattern Separation
• Reduce Sensitivity below 1.0
• Enable all technical filters
Dashboard Shows "CAUTION"
This indicates:
• Market conditions are unfavorable
• Regime is RANGING or QUIET
• Market score is low
• Consider waiting for better conditions
• Or adjust expectations accordingly
Patterns Not Reaching Targets
Consider:
• Market may be choppy
• Volatility may have changed
• Try Dynamic target mode
• Reduce target/risk ratio requirement
• Check if regime is VOLATILE
---
ALERTS CONFIGURATION
Alert Message Format
Alerts include:
• Pattern type (Bullish/Bearish)
• Strength rating
• Market regime
• Analysis price level
• Target and invalidation levels
• Strength percentage
• Target/Risk ratio
• Educational disclaimer
Setting Up Alerts
• Click Alert button on TradingView
• Select SMPS indicator
• Choose alert frequency
• Customize message if desired
• Alerts fire on pattern detection
---
DATA WINDOW INFORMATION
The Data Window displays:
• Market Regime Score (0-100)
• Market Structure Bias (-1 to +1)
• Bullish Strength (0-100)
• Bearish Strength (0-100)
• Bull Target/Risk Ratio
• Bear Target/Risk Ratio
• Relative Volume
• Momentum Value
• Volume Flow Strength
• Bull Confirmations Count
• Bear Confirmations Count
---
BEST PRACTICES AND TIPS
For Beginners
• Start with default settings
• Use High Confirmation Mode
• Focus on TRENDING regime only
• Paper trade first
• Learn one timeframe thoroughly
For Intermediate Users
• Experiment with sensitivity settings
• Try different target modes
• Use multiple timeframes
• Combine with price action analysis
• Track pattern success rate
For Advanced Users
• Customize per instrument
• Create setting templates
• Use regime information for bias
• Combine with other indicators
• Develop systematic rules
---
IMPORTANT DISCLAIMERS
• This indicator is for educational and informational purposes only
• Not financial advice or a trading system
• Past performance does not guarantee future results
• Trading involves substantial risk of loss
• Always use appropriate risk management
• Verify patterns with additional analysis
• The author is not a registered investment advisor
• No liability accepted for trading losses
---
VERSION NOTES
Version 1.0.0 - Initial Release
• Six-layer confluence system
• Adaptive parameter technology
• Institutional volume detection
• Market regime classification
• Structure break identification
• Real-time dashboard
• Multiple display modes
• Comprehensive settings
## My Final Thoughts
Smart Money Precision Structure represents an advanced approach to market analysis, bringing institutional-grade techniques to retail traders through intelligent automation and multi-dimensional evaluation. By combining six analytical frameworks with adaptive parameter adjustment, SMPS provides comprehensive market intelligence that single indicators cannot achieve.
The indicator serves as an educational tool for understanding how professional traders analyze markets, while providing practical pattern detection for those seeking to improve their technical analysis. Remember that all trading involves risk, and this tool should be used as part of a complete analysis approach, not as a standalone trading system.
- BullByte Indicador

Repeating Trend HighlighterThis custom indicator helps you see when the current price trend is similar to a past trend over the same number of candles. Think of it like checking whether the market is repeating itself.
You choose three settings:
• Lookback Period: This is how many candles you want to measure. For example, if you set it to 10, it looks at the price change over the last 10 bars.
• Offset Bars Ago: This tells the indicator how far back in time to look for a similar move. If you set it to 50, it compares the current move to what happened 50 bars earlier.
• Tolerance (%): This is how closely the moves must match to be considered similar. A smaller number means you only get a signal if the moves are almost the same, while a larger number allows more flexibility.
When the current price move is close enough to the past move you picked, the background of your chart turns light green. This makes it easy to spot repeating trends without studying numbers manually.
You’ll also see two lines under your chart if you enable them: a blue line showing the percentage change of the current move and an orange line showing the change in the past move. These help you compare visually.
This tool is useful in several ways. You can use it to confirm your trading setups, for example if you suspect that a strong rally or pullback is happening again. You can also use it to filter trades by combining it with other indicators, so you only enter when trends repeat. Many traders use it as a learning tool, experimenting with different lookback periods and offsets to understand how often similar moves happen.
If you are a scalper working on short timeframes, you can set the lookback to a small number like 3–5 bars. Swing traders who prefer daily or weekly charts might use longer lookbacks like 20–30 bars.
Keep in mind that this indicator doesn’t guarantee price will move the same way again—it only shows similarity in how price changed over time. It works best when you use it together with other signals or market context.
In short, it’s like having a simple spotlight that tells you: “This move looks a lot like what happened before.” You can then decide if you want to act on that information.
If you’d like, I can help you tweak the settings or combine it with alerts so it notifies you when these patterns appear.
Indicador

Trend Strength Oscillator📌 What Is the Trend Strength Oscillator?
The Trend Strength Oscillator is a visual tool that helps traders understand the overall direction and strength of the market trend. Instead of using multiple indicators separately, this tool combines three trusted methods into one clear, color-coded bar chart. The bars change based on whether the market is strongly trending up, down, or just moving sideways.
Imagine it as a traffic light for trading:
• Green means it’s safe to consider buying (strong uptrend).
• Red means consider selling or avoiding longs (strong downtrend).
• Gray means wait, the market isn’t clearly trending.
🧠 How It Works — The 3 Main Components
1. EMA Slope
The EMA (Exponential Moving Average) tracks the average price but reacts more quickly to changes. If the EMA is rising, it means the market is likely moving upward. If it’s falling, the trend is likely downward.
2. RSI Direction
RSI (Relative Strength Index) measures momentum. This tool compares the RSI to its smoothed average. If the RSI is above its average, momentum is up. If it’s below, momentum is down.
3. ADX Strength
ADX (Average Directional Index) measures how strong a trend is, not the direction. So even if EMA and RSI agree on a trend, the ADX must confirm it’s strong enough to be worth trading.
Only when all three indicators agree do we consider it a strong trend.
🧮 What the Oscillator Shows
The result of combining those components is a number that becomes a colored bar:
• +2 means all three signals are bullish → green bar.
• -2 means all three signals are bearish → red bar.
• Anything else (e.g., mixed signals or weak ADX) → gray bar.
This makes the chart super easy to read at a glance, even for beginners.
📈 How to Use It in Trading
You can use the Trend Strength Oscillator in a few simple ways:
• Entering Trades:
Look for a green bar when you want to buy or go long. Look for a red bar when you want to sell or go short. These bars mean all systems are “go” in the same direction.
• Avoiding Mistakes:
If the bar is gray, it’s a warning that the market is undecided or weak. It’s often better to wait for a clearer signal rather than force a trade.
• Managing Existing Trades:
If you’re in a trade and the bar color shifts back to gray, that can be a clue that the trend is losing strength. You might tighten your stop-loss or take some profit.
🧭 Final Thoughts
This indicator doesn’t give you a trade entry every few minutes. Instead, it helps you stay on the right side of strong moves and avoid choppy or sideways markets. It’s especially helpful for:
• Trend-following traders
• People who want clean, simple visuals
• Beginners who get overwhelmed with too many indicators
Let me know if you'd like to see this paired with another tool like volume or MACD, or if you’d like a chart screenshot to visualize how this looks live.
Indicador

Regime Filter IndicatorRegime Filter – Crypto Market Trend Indicator
📊 Overview
The Regime Filter is a powerful market analysis indicator designed specifically for crypto trading. It helps traders identify whether the market is in a bullish or bearish phase by analyzing key assets in the cryptocurrency market, including Bitcoin (BTC), Bitcoin Dominance (BTC.D), and the Altcoin Market (TOTAL3). The indicator compares these assets against their respective Simple Moving Averages (SMA) to determine the overall market regime, allowing traders to make more informed decisions.
🔍 How It Works
The Regime Filter evaluates three main components to determine the market's sentiment:
1. BTC Dominance (BTC.D) vs. 40 SMA (Medium Timeframe)
The Bitcoin Dominance (BTC.D) is compared to its 40-period SMA on a mid-timeframe (e.g.,
1-hour). If BTC.D is below the 40 SMA, it indicates that altcoins are performing well relative
to Bitcoin, suggesting a bullish altcoin market. If BTC.D is above the 40 SMA, Bitcoin is
gaining dominance, indicating a potential bearish phase for altcoins.
2. TOTAL3 Market Cap vs. 100 SMA (Medium Timeframe)
The TOTAL3 index, which tracks the total market capitalization of all cryptocurrencies except
Bitcoin and Ethereum, is compared to its 100-period SMA. A bullish signal occurs when TOTAL3
is above the 100 SMA, indicating strength in altcoins, while a bearish signal occurs when
TOTAL3 is below the 100 SMA, signaling a potential weakness in the altcoin market.
3. BTC Price vs. 200 SMA (Higher Timeframe)
The current Bitcoin price is compared to its 200-period Simple Moving Average (SMA) on a
higher timeframe (e.g., 4-hour). A bullish signal is given when the BTC price is above the 200
SMA, and a bearish signal when it's below.
🟢 Bullish Market Conditions
The market is considered bullish when:
- BTC Dominance (BTC.D) is below the 40 SMA, suggesting altcoins are gaining momentum.
- TOTAL3 Market Cap is above the 100 SMA, signaling strength in the altcoin market.
- BTC price is above the 200 SMA, indicating an uptrend in Bitcoin.
In these conditions, the background turns green 🟢, and a "Bullish" label is displayed on the chart.
🔴 Bearish Market Conditions
The market is considered bearish when:
- BTC Dominance (BTC.D) is above the 40 SMA, indicating Bitcoin is outperforming altcoins.
- TOTAL3 Market Cap is below the 100 SMA, signaling weakness in altcoins.
- BTC price is below the 200 SMA, indicating a downtrend in Bitcoin.
In these conditions, the background turns red 🔴, and a "Bearish" label appears on the chart.
⚙ Customization Options
- The Regime Filter offers flexibility for traders:
- Enable or Disable Specific SMAs: Customize the indicator by enabling or disabling the 200 SMA for Bitcoin, the 40 SMA for BTC Dominance, and the 100 SMA for TOTAL3.
- Adjust Timeframes: Choose the timeframes for each of the moving averages to suit your preferred trading strategy.
- Real-Time Data Adjustments: The indicator updates in real-time to reflect current market conditions, ensuring timely analysis.
📈 Best Use Cases
- Trend Confirmation: The Regime Filter is ideal for confirming the market's overall trend,
helping traders to align their positions with the dominant market sentiment.
- Trade Entry/Exit Signals: Use the indicator to identify favorable entry or exit points based on
whether the market is in a bullish or bearish phase.
- Market Overview: Gain a quick understanding of the broader crypto market, with a focus on
Bitcoin and altcoins, to make more strategic decisions.
⚠️ Important Notes
Trend-Following Indicator: The Regime Filter is a trend-following tool, meaning it works best in strong trending markets. It may not perform well in choppy, sideways markets.
Risk Management: This indicator is designed to assist in identifying market trends, but it does not guarantee profits. Always apply sound risk management strategies and use additional indicators when making trading decisions.
Not a Profit Guarantee: While this indicator can help identify potential market trends, no trading tool or strategy guarantees profits. Please trade responsibly and ensure that your decisions are based on comprehensive analysis and risk tolerance.
Indicador

SuperTrend MTF Pro [Cometreon]The SuperTrend MTF Pro takes the classic SuperTrend to a whole new level of customization and accuracy. Unlike the standard version, this indicator allows you to select different moving averages, apply it to various chart types, and fine-tune every key parameter.
If you're looking for an advanced, non-repainting, and highly configurable SuperTrend, this is the right choice for you.
🔷 New Features and Improvements
🟩 Multi-MA SuperTrend
Now you can customize the SuperTrend calculation by choosing from 15 different moving averages:
SMA (Simple Moving Average)
EMA (Exponential Moving Average)
WMA (Weighted Moving Average)
RMA (Smoothed Moving Average)
HMA (Hull Moving Average)
JMA (Jurik Moving Average)
DEMA (Double Exponential Moving Average)
TEMA (Triple Exponential Moving Average)
LSMA (Least Squares Moving Average)
VWMA (Volume-Weighted Moving Average)
SMMA (Smoothed Moving Average)
KAMA (Kaufman’s Adaptive Moving Average)
ALMA (Arnaud Legoux Moving Average)
FRAMA (Fractal Adaptive Moving Average)
VIDYA (Variable Index Dynamic Average)
🟩 Multiple Chart Types
You're no longer limited to candlestick charts! Now you can use SuperTrend with different chart formats, including:
Heikin Ashi
Renko
Kagi
Line Break
Point & Figure
🟩 Customizable Timeframe
Now you can adjust the SuperTrend timeframe without repainting issues, avoiding signal distortions.
🔷 Technical Details and Customizable Inputs
SuperTrend offers multiple customization options to fit any trading strategy:
1️⃣ ATR Period – Defines the ATR length, affecting the indicator’s sensitivity.
2️⃣ Source – Selects the price value used for calculations (Close, HL2, Open, etc.).
3️⃣ ATR Mult – Multiplies the ATR to determine band distance. Higher values reduce false signals, lower values make it more reactive.
4️⃣ Change ATR Calculation Method – When enabled, uses the default ATR method; when disabled, allows selecting another Moving Average with "Use Different Type".
5️⃣ Source Break – Defines the price source for trend changes (Close for more stability, High/Low for more reactivity).
6️⃣ Use Different Type – Allows selecting an alternative Moving Average for ATR calculation if "Change ATR Calculation Method" is disabled.
7️⃣ SuperTrend Type – Advanced options for specific MAs (JMA, ALMA, FRAMA, VIDYA), with dedicated parameters like Phase, Sigma, and Offset for optimized responsiveness.
8️⃣ Ticker Settings – Customize parameters for special chart types such as Renko, Heikin Ashi, Kagi, Line Break, and Point & Figure, adjusting reversal, number of lines, and ATR length.
9️⃣ Timeframe – Enables using SuperTrend on a higher timeframe.
🔟 Wait for Timeframe Closes -
✅ Enabled – Prevents multiple signals, useful for precise alerts.
❌ Disabled – Displays SuperTrend smoothly without interruptions.
🔷 How to Use SuperTrend MTF Pro
🔍 Identifying Trends
SuperTrend follows the ongoing trend and provides clear visual signals:
When the price is above the line, the trend is bullish.
When the price is below the line, the trend is bearish.
📈 Interpreting Signals
Line color and position change → Possible trend reversal
Bounce off the line → Potential trend continuation
Strong breakout of the line → Possible reversal
🛠 Integration with Other Tools
RSI or MACD to filter false signals
Moving Averages to confirm trend direction
Support and Resistance to improve entry points
☄️ If you find this indicator useful, leave a Boost to support its development!
Every feedback helps to continuously improve the tool, offering an even more effective trading experience. Share your thoughts in the comments! 🚀🔥 Indicador

Trend Speed Analyzer (Zeiierman)█ Overview
The Trend Speed Analyzer by Zeiierman is designed to measure the strength and speed of market trends, providing traders with actionable insights into momentum dynamics. By combining a dynamic moving average with wave and speed analysis, it visually highlights shifts in trend direction, market strength, and potential reversals. This tool is ideal for identifying breakout opportunities, gauging trend consistency, and understanding the dominance of bullish or bearish forces over various timeframes.
█ How It Works
The indicator employs a Dynamic Moving Average (DMA) enhanced with an Accelerator Factor, allowing it to adapt dynamically to market conditions. The DMA is responsive to price changes, making it suitable for both long-term trends and short-term momentum analysis.
Key components include:
Trend Speed Analysis: Measures the speed of market movements, highlighting momentum shifts with visual cues.
Wave Analysis: Tracks bullish and bearish wave sizes to determine market strength and bias.
Normalized Speed Values: Ensures consistency across different market conditions by adjusting for volatility.
⚪ Average Wave and Max Wave
These metrics analyze the size of bullish and bearish waves over a specified Lookback Period:
Average Wave: This represents the mean size of bullish and bearish movements, helping traders gauge overall market strength.
Max Wave: Highlights the largest movements within the period, identifying peak momentum during trend surges.
⚪ Current Wave Ratio
This feature compares the current wave's size against historical data:
Average Wave Ratio: Indicates if the current momentum exceeds historical averages. A value above 1 suggests the trend is gaining strength.
Max Wave Ratio: Shows whether the current wave surpasses previous peak movements, signaling potential breakouts or trend accelerations.
⚪ Dominance
Dominance metrics reveal whether bulls or bears have controlled the market during the Lookback Period:
Average Dominance: Compares the net difference between average bullish and bearish wave sizes.
Max Dominance: Highlights which side had the stronger individual waves, indicating key power shifts in market dynamics.
Positive values suggest bullish dominance, while negative values point to bearish control. This helps traders confirm trend direction or anticipate reversals.
█ How to Use
Identify Trends: Leverage the color-coded candlesticks and dynamic trend line to assess the overall market direction with clarity.
Monitor Momentum: Use the Trend Speed histogram to track changes in momentum, identifying periods of acceleration or deceleration.
Analyze Waves: Compare the sizes of bullish and bearish waves to identify the prevailing market bias and detect potential shifts in sentiment. Additionally, fluctuations in Current Wave ratio values should be monitored as early indicators of possible trend reversals.
Evaluate Dominance: Utilize dominance metrics to confirm the strength and direction of the current trend.
█ Settings
Maximum Length: Sets the smoothing of the trend line.
Accelerator Multiplier: Adjusts sensitivity to price changes.
Lookback Period: Defines the range for wave calculations.
Enable Table: Displays statistical metrics for in-depth analysis.
Enable Candles: Activates color-coded candlesticks.
Collection Period: Normalizes trend speed values for better accuracy.
Start Date: Limits calculations to a specific timeframe.
Timer Option: Choose between using all available data or starting from a custom date.
-----------------
Disclaimer
The information contained in my Scripts/Indicators/Ideas/Algos/Systems does not constitute financial advice or a solicitation to buy or sell any securities of any type. I will not accept liability for any loss or damage, including without limitation any loss of profit, which may arise directly or indirectly from the use of or reliance on such information.
All investments involve risk, and the past performance of a security, industry, sector, market, financial product, trading strategy, backtest, or individual's trading does not guarantee future results or returns. Investors are fully responsible for any investment decisions they make. Such decisions should be based solely on an evaluation of their financial circumstances, investment objectives, risk tolerance, and liquidity needs.
My Scripts/Indicators/Ideas/Algos/Systems are only for educational purposes!
Indicador

Weighted CG Oscillator with ATRATR-Weighted CG Oscillator
The ATR-Weighted CG Oscillator is an enhanced version of the Center of Gravity (CG) Oscillator, originally developed by John Ehlers . By adding the Average True Range (ATR) to dynamically adjust the oscillator’s values based on market volatility, this indicator aims to make trend signals more responsive to price changes, offering an adaptive tool for trend analysis.
Functionality Overview :
The CG Oscillator, a classic trend-following indicator, has been modified here to incorporate the ATR for improved context and adaptability in different market conditions. The indicator calculates the CG Oscillator and scales it by dividing the ATR by the closing price to normalize for volatility. This creates a “weighted” CG Oscillator that generates more contextually relevant signals. A colored line shows green for long signals (above the long threshold), red for short signals (below the short threshold), and gray for neutral conditions.
Input Parameters :
CGO Length : Sets the period of the CG Oscillator calculation.
ATR Length : Determines the period of the ATR calculation. Longer periods smooth out the volatility impact.
Long Threshold : The threshold that triggers a long signal; a long (green) signal occurs when the weighted CG Oscillator crosses above this level.
Short Threshold : The threshold that triggers a short signal; a short (red) signal occurs when the weighted CG Oscillator crosses below this level.
Source : Specifies the data source for CG Oscillator calculations, with the default set to the closing price.
Recommended Use :
This indicator is designed to be an adaptive tool, not your sole resource. To ensure its effectiveness, it’s essential to backtest the indicator on your chosen asset over your preferred timeframe. Market dynamics vary, so testing the indicator’s parameters—especially the thresholds—will allow you to find the settings that best suit your strategy. While the default values work well for some scenarios, customizing the settings will help align the indicator with your unique trading style and the asset’s characteristics. Indicador

Depth Trend Indicator - RSIDepth Trend Indicator - RSI
This indicator is designed to identify trends and gauge pullback strength by combining the power of RSI and moving averages with a depth-weighted calculation. The script was created by me, Nathan Farmer and is based on a multi-step process to determine trend strength and direction, adjusted by a "depth" factor for more accurate signal analysis.
How It Works
Trend Definition Using RSI: The RSI Moving Average ( rsiMa ) is calculated to assess the current trend, using customizable parameters for the RSI Period and MA Period .
Trends are defined as follows:
Uptrend : RSI MA > Critical RSI Value
Downtrend : RSI MA < Critical RSI Value
Pullback Depth Calculation: To measure pullback strength relative to the current trend, the indicator calculates a Depth Percentage . This is defined as the portion of the gap between the moving average and the price covered by a pullback.
Depth-Weighted RSI Calculation: The Depth Percentage is then applied as a weighting factor on the RSI Moving Average , giving us a Weighted RSI line that adjusts to the depth of pullbacks. This line is rather noisy, and as such we take a moving average to smooth out some of the noise.
Key Parameters
RSI Period : The period for RSI calculation.
MA Period : The moving average period applied to RSI.
Price MA Period : Determines the SMA period for price, used to calculate pullback depth.
Smoothing Length : Length of smoothing applied to the weighted RSI, creating a more stable signal.
RSI Critical Value : The critical value (level) used in determining whether we're in an uptrend or a downtrend.
Depth Critical Value : The critical value (level) used in determining whether or not the depth weighted value confirms the state of a trend.
Notes:
As always, backtest this indicator and modify the parameters as needed for your specific asset, over your specific timeframe. I chose these defaults as they worked well on the assets I look at, but it is likely you tend to look at a different group of assets over a different timeframe than what I do.
Large pullbacks can create large downward spikes in the weighted line. This isn't graphically pleasing, but I have tested it with various methods of normalization and smoothing and found the simple smoothing used in the indicator to be best despite this.
Indicador

Indicador

Dynamic Momentum GaugeOverview
The Dynamic Momentum Gauge is an indicator designed to provide information and insights into the trend and momentum of a financial asset. While this indicator is not directional , it helps you know when there will be a trend, big move, or when momentum will have a run, and when you should take profits.
How It Works
This indicator calculates momentum and then removes the negative values to focus instead on when the big trend could likely happen and when it could end, or when you should enter a trade based on momentum or exit. Traders can basically use this indicator to time their market entries or exits, and align their strategies with momentum dynamics.
How To Use
As previously mentioned, this is not a directional indicator but more like a timing indicator. This indicator helps you find when the trend moves, and big moves in the markets will occur and its possibly best to exit the trades. For example, if you decide to enter a long trade if the Dynamic Momentum Gauge value is at an extreme low and another momentum indicator that you use has conditions that you would consider to long with, then this indicator is basically telling you that there isn't more space for the momentum to squeeze any longer, can only really expand from that point or stay where it currently is, but this is also a mean reverting process so it does tend to go back up from the low point.
Settings:
Length: This is the length of the momentum, by default its at 100.
Normalization Length: Length of the Normalization which ensures the the values fall within a consistent range.
Indicador

Highest-Lowest Trend𝙃𝙄𝙂𝙃𝙀𝙎𝙏-𝙇𝙊𝙒𝙀𝙎𝙏 𝙏𝙍𝙀𝙉𝘿 𝙄𝙉𝘿𝙄𝘾𝘼𝙏𝙊𝙍
Overview:
The "Highest-Lowest Trend" indicator helps traders identify trends based on the highest and lowest values within a specified period. It provides visual cues to understand potential trend changes, making it a valuable tool for technical analysis.
Settings:
Length and Offset: Adjust the length and offset parameters to customize the sensitivity of the indicator.
Source: Determines whether to use the high and low prices or the closing price and others for calculations.
Visual Settings:
Bar Color: Enables or disables the coloring of bars based on the trend direction.
Up Color: Specifies the color for upward trends.
Down Color: Specifies the color for downward trends.
Indicator Calculation:
The indicator calculates the highest and lowest values within the defined length and offset.
The current trend is determined based on whether the closing price is above or below these values.
When the source crossed above highest indicator changes trend to upside and start to use lowest value and vice versa.
/// 𝙄𝙉𝘿𝙄𝘾𝘼𝙏𝙊𝙍 𝘾𝘼𝙇𝘾𝙐𝙇𝘼𝙏𝙄𝙊𝙉 ///
var series float hlt = 0.0
series float upper = ta.highest(Use_High_and_Low ? high : src, length)
series float lower = ta.lowest( Use_High_and_Low ? high : src, length)
hlt := src > upper ?
lower : src < lower ?
upper : nz(hlt)
Usage:
Trend Identification: Watch for price to be above Trend Indicator crosses for up trend and below for down trend.
Length and Offset: Adjust the length and offset parameters to customize the sensitivity of the indicator.
Color, color bars: Change color of trends and bars for your taste
Note:
Trading involves inherent risks, and it is essential to exercise caution and employ multiple tools and indicators for comprehensive analysis. While the "Highest-Lowest Trend" indicator provides valuable insights into potential trend changes, relying solely on one tool for trading decisions is not recommended. Market conditions can be dynamic, and using a combination of indicators can enhance your overall analysis, providing a more robust foundation for decision-making. Always consider the broader market context, risk management strategies, and other relevant factors before executing trades. Indicador

SuperTrend ToolkitThe SuperTrend Toolkit (Super Kit) introduces a versatile approach to trend analysis by extending the application of the SuperTrend indicator to a wide array of @TradingView's built-in or Community Scripts . This tool facilitates the integration of the SuperTrend algorithm with various indicators, including oscillators, moving averages, overlays, and channels.
Methodology:
The SuperTrend, at its core, calculates a trend-following indicator based on the Average-True-Range (ATR) and price action. It creates dynamic support and resistance levels, adjusting to changing market conditions, and aiding in trend identification.
pine_st(simple float factor = 3., simple int length = 10) =>
float atr = ta.atr(length)
float up = hl2 + factor * atr
up := up < nz(up ) or close > nz(up ) ? up : nz(up )
float lo = hl2 - factor * atr
lo := lo > nz(lo ) or close < nz(lo ) ? lo : nz(lo )
int dir = na
float st = na
if na(atr )
dir := 1
else if st == nz(up )
dir := close > up ? -1 : 1
else
dir := close < lo ? 1 : -1
st := dir == -1 ? lo : up
@TradingView's native SuperTrend lacks the flexibility to incorporate different price sources into its calculation.
Community scripts, addressed the limitation by implementing the option to input different price sources, for example, one of the most popular publications, @KivancOzbilgic's SuperTrend script.
In May 2023, @TradingView introduced an update allowing the passing of another indicator's plot as a source value via the input.source() function. However, the built-in ta.atr function still relied on the chart's price data, limiting the formerly mentioned scripts to the chart's price data alone.
Unique Approach -
This script addresses the aforementioned limitations by processing the data differently.
Firstly we create a User-Defined-Type (UDT) replicating a bar's open, high, low, close (OHLC) values.
type bar
float o = open
float h = high
float l = low
float c = close
We then use this type to store the external input data.
src = input.source(close, "External Source")
bar b = bar.new(
nz(src ) , open 𝘷𝘢𝘭𝘶𝘦
math.max(nz(src ), src), high 𝘷𝘢𝘭𝘶𝘦
math.min(nz(src ), src), low 𝘷𝘢𝘭𝘶𝘦
src ) close 𝘷𝘢𝘭𝘶𝘦
Finally, we pass the data into our custom built SuperTrend with ATR functions to derive the external source's version of the SuperTrend indicator.
supertrend st = b.st(mlt, len)
- Setup Guide -
Utility and Use Cases:
Universal Compatibility - Apply SuperTrend to any built-in indicator or script, expanding its use beyond traditional price data.
- A simple example on one of my own public scripts -
Trend Analysis - Gain additional trend insights into otherwise mainly mean reverting or volume indicators.
- Alerts Setup Guide -
The Super Kit empowers traders and analysts with a tool that adapts the robust SuperTrend algorithm to a myriad of indicators, allowing comprehensive trend analysis and strategy development. Indicador

Enhanced McClellan Summation Index
The Enhanced McClellan Summation Index (MSI) is a comprehensive tool that transforms the MSI indicator with Heikin-Ashi visualization, offering improved trend analysis and momentum insights. This indicator includes MACD and it's histogram calculations to refine trend signals, minimize false positives and offer additional momentum analysis.
Methodology:
McClellan Summation Index (MSI) -
The MSI begins by calculating the ratio between advancing and declining issues in the specified index.
float decl = 𝘐𝘯𝘥𝘪𝘤𝘦 𝘥𝘦𝘤𝘭𝘪𝘯𝘪𝘯𝘨 𝘪𝘴𝘴𝘶𝘦𝘴
float adv = 𝘐𝘯𝘥𝘪𝘤𝘦 𝘢𝘥𝘷𝘢𝘯𝘤𝘪𝘯𝘨 𝘪𝘴𝘴𝘶𝘦𝘴
float ratio = (adv - decl) / (adv + decl)
It then computes a cumulative sum of the MACD (the difference between a 19-period EMA and a 39-period EMA) of this ratio. The result is a smoothed indicator reflecting market breadth and momentum.
macd(float r) =>
ta.ema(r, 19) - ta.ema(r, 39)
float msi = ta.cum(macd(ratio))
Heikin-Ashi Transformation -
Heikin-Ashi is a technique that uses a modified candlestick formula to create a smoother representation of price action. It averages the open, close, high, and low prices of the current and previous periods. This transformation reduces noise and provides a clearer view of trends.
type bar
float o = open
float h = high
float l = low
float c = close
bar b = bar.new()
float ha_close = math.avg(b.o, b.h, b.l, b.c)
MACD and Histogram -
The Enhanced MSI incorporates MACD and histogram calculations to provide additional momentum analysis and refine trend signals. The MACD represents the difference between the 12-period EMA and the 26-period EMA of the MSI. The histogram is the visual representation of the difference between the MACD and its signal line.
Options:
Index Selection - Choose from TVC:NYA , NASDAQ:NDX , or TVC:XAX to tailor the MSI-HA to the desired market index.
MACD Settings - Adjust the parameters for the MACD calculation to fine-tune the indicator's responsiveness.
Ratio Multiplier - Apply scaling to the MSI to suit different market conditions and indices.
Benefits of Heikin-Ashi -
Smoothed Trends - Heikin-Ashi reduces market noise, providing a more apparent and smoothed representation of trends.
Clearer Patterns - Candlestick patterns are more distinct, aiding in the identification of trend reversals and continuations.
Utility and Use Cases:
Trend & Momentum Analysis - Utilize the tool's Heikin-Ashi visualization for clearer trend identification in confluence with it's MACD and histogram to gain additional insights into the strength and direction of trends, while filtering out potential false positives.
Breadth Analysis - Explore market breadth through the MSI's cumulative breadth indicator, gauging the overall health and strength of the underlying market.
- Alerts Setup Guide -
The Enhanced MSI is a robust indicator that combines the breadth analysis of the McClellan Summation Index with the clarity of Heikin-Ashi visualization and additional momentum insights from MACD and histogram calculations. Its customization options make it adaptable to various indices and market conditions, offering traders a comprehensive tool for trend and momentum analysis. Indicador

Standardized SuperTrend Oscillator
The Standardized SuperTrend Oscillator (SSO) is a versatile tool that transforms the SuperTrend indicator into an oscillator, offering both trend-following and mean reversion capabilities. It provides deeper insights into trends by standardizing the SuperTrend with respect to its upper and lower bounds, allowing traders to identify potential reversals and contrarian signals.
Methodology:
Lets begin with describing the SuperTrend indicator, which is the fundamental tool this script is based on.
SuperTrend:
The SuperTrend is calculated based on the average true range (ATR) and multiplier. It identifies the trend direction by placing a line above or below the price. In an uptrend, the line is below the price; in a downtrend, it's above the price.
pine_st(float src = hl2, float factor = 3., simple int len = 10) =>
float atr = ta.atr(len)
float up = src + factor * atr
up := up < nz(up ) or close > nz(up ) ? up : nz(up )
float lo = src - factor * atr
lo := lo > nz(lo ) or close < nz(lo ) ? lo : nz(lo )
int dir = na
float st = na
if na(atr )
dir := 1
else if st == nz(up )
dir := close > up ? -1 : 1
else
dir := close < lo ? 1 : -1
st := dir == -1 ? lo : up
SSO Oscillator:
The SSO is derived from the SuperTrend and the source price. It calculates the standardized difference between the SuperTrend and the source price. The standardization is achieved by dividing this difference by the distance between the upper and lower bounds of the SuperTrend.
float sso = (src - st) / (up - lo)
Components and Features:
SuperTrend of Oscillator - An additional SuperTrend based on the direction and volatility of the oscillator, behaving as the SuperTrend OF the SuperTrend. This provides further trend analysis of the underlying broad trend regime.
Reversion Tracer - The RSI of the direction of the original SuperTrend, providing a dynamic threshold for premium and discount price areas.
float rvt = ta.rsi(dir, len)
Heikin Ashi Transform - An option to apply the Heikin Ashi transform to the source price of the oscillator, providing a smoother visual representation of trends.
Display Modes - Choose between Line mode for a standard oscillator view or Candle mode, displaying the oscillator as Heikin Ashi candles for more in-depth trend analysis.
Contrarian and Reversion Signals:
Contrarian Signals - Based on the SuperTrend of the oscillator, these signals can act as potential buy or sell indications, highlighting potential trend exhaustion or premature reversals.
Reversion Signals - Generated when the oscillator crosses above or below the Reversion Tracer, signaling potential mean reversion opportunities or trend breakouts.
Utility and Use Cases:
Trend Analysis - Utilize the SSO as a trend-following tool with the added benefits of the oscillator's SuperTrend and Heikin Ashi transform.
Valuation Analysis - Leverage the oscillator's reversion signals for identifying potential mean reversion opportunities in the market.
The Standardized SuperTrend Oscillator enhances the capabilities of the SuperTrend indicator, offering a balanced approach to both trend-following and mean reversion strategies. Its customizable options and contrarian signals make it a valuable instrument for traders seeking comprehensive trend analysis and potential reversal signals. Indicador